Adding Missing Games
The control panel supports the launch and basic control of any game servers and applications. This manual covers making a new game by the example of Sven Co-op. Each step will include explanations.
If the game has a Pelican or Pterodactyl egg, you can import it instead of filling everything in by hand — see Games Import.
Game adding
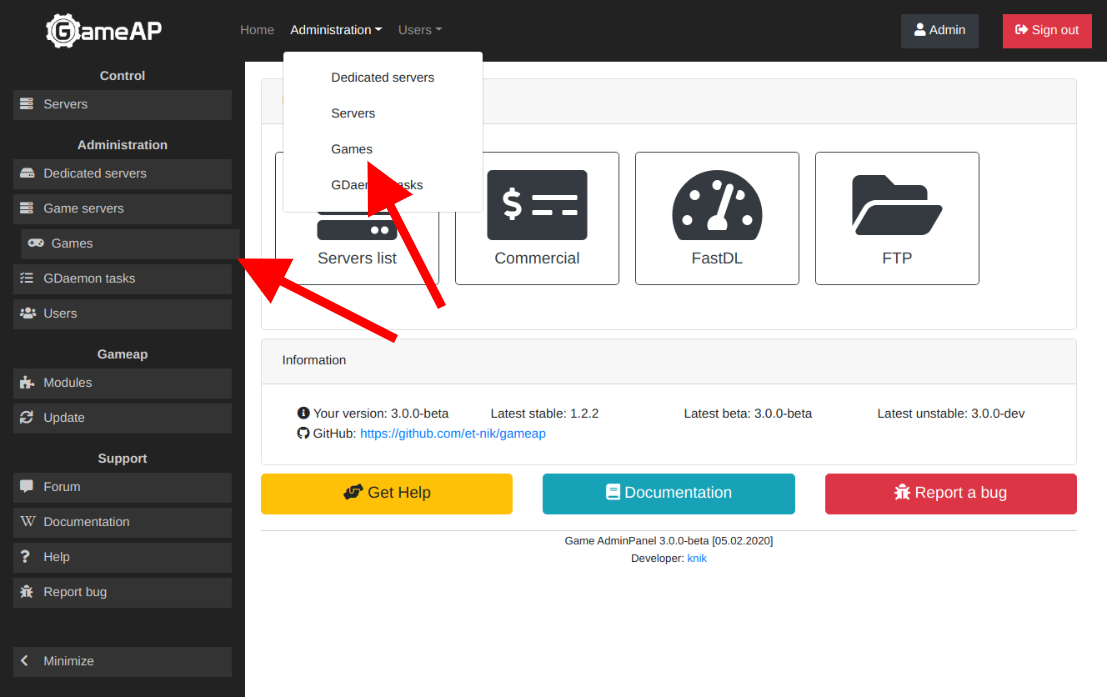
First, go to the add game page. Go to “Administration” menu, then select “Games”.
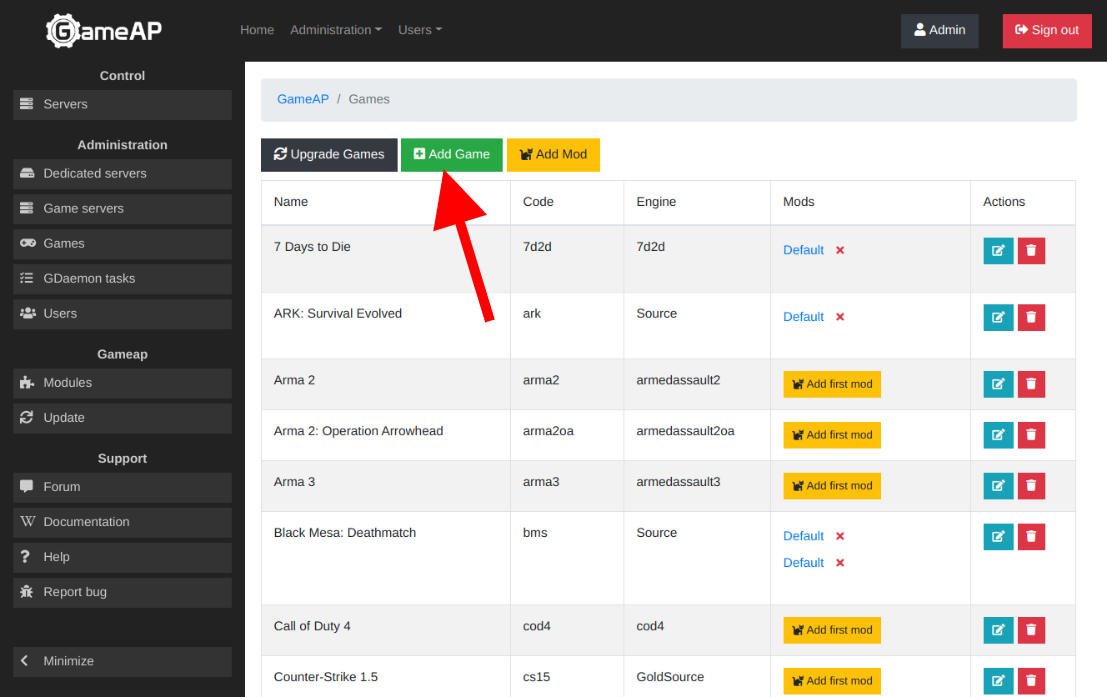
Next, find the “Add Game” button on the top of the page and click on it.
You will be redirected to the new game add page. Here you specify some details of your new game.
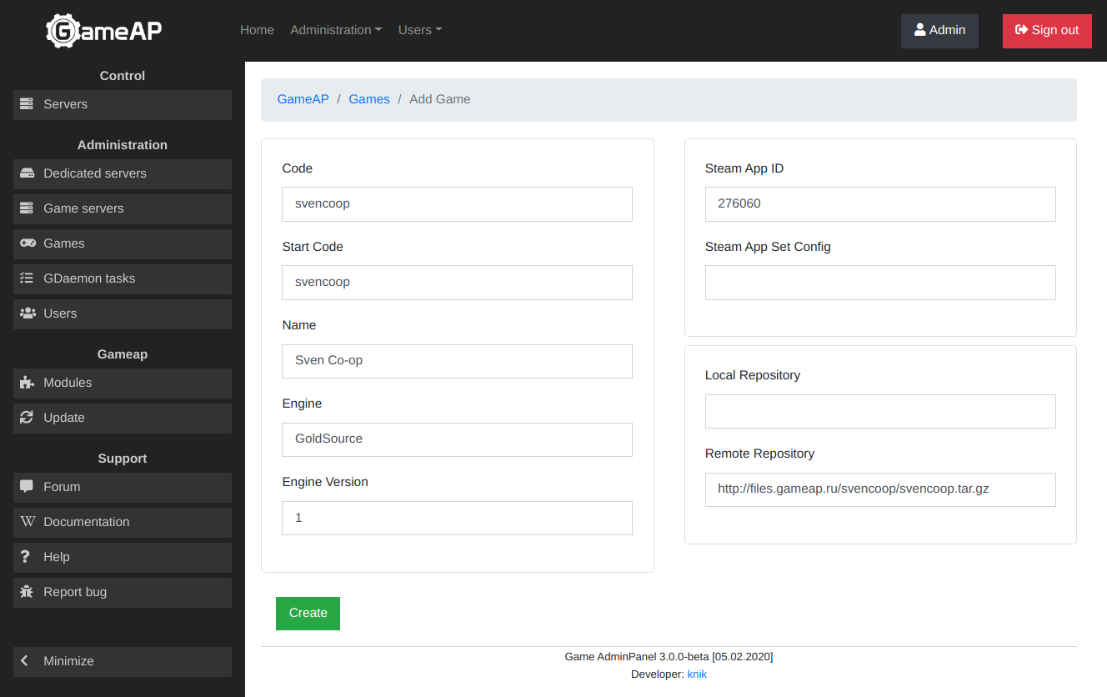
You must fill in the following fields:
- Code. Enter the abbreviated game name
- Start code. You can also enter the abbreviated game name.
- Game name
- Game engine. If the game is written in Unity or without using the engine, enter the abbreviated game name
- Version. Enter the version number or semantic value, for example “legacy”, “beta”, etc.
Note! To enable automatic installation, you must fill in one of the following fields:
- Steam APP ID. Find out the value for the game you are interested in at Steam official wiki, or in the database SteamDB
- Remote repository. A link to an archive over HTTP or FTP
- Local repository.
All these fields are optional, but one of them must have a value.
Read more about the meaning of fields at Game Settings, Fields Description page.
Mod adding
Each game must have at least one mod.
Mod is a strong GameAP tool, you can enable additional plugins, configuration or any content for extending the basic server capabilities. The archive with files you specify for the mod will be unzipped over the base server build.
To add a new mod for a specific game, select the game in the list and click “Add first mod”.
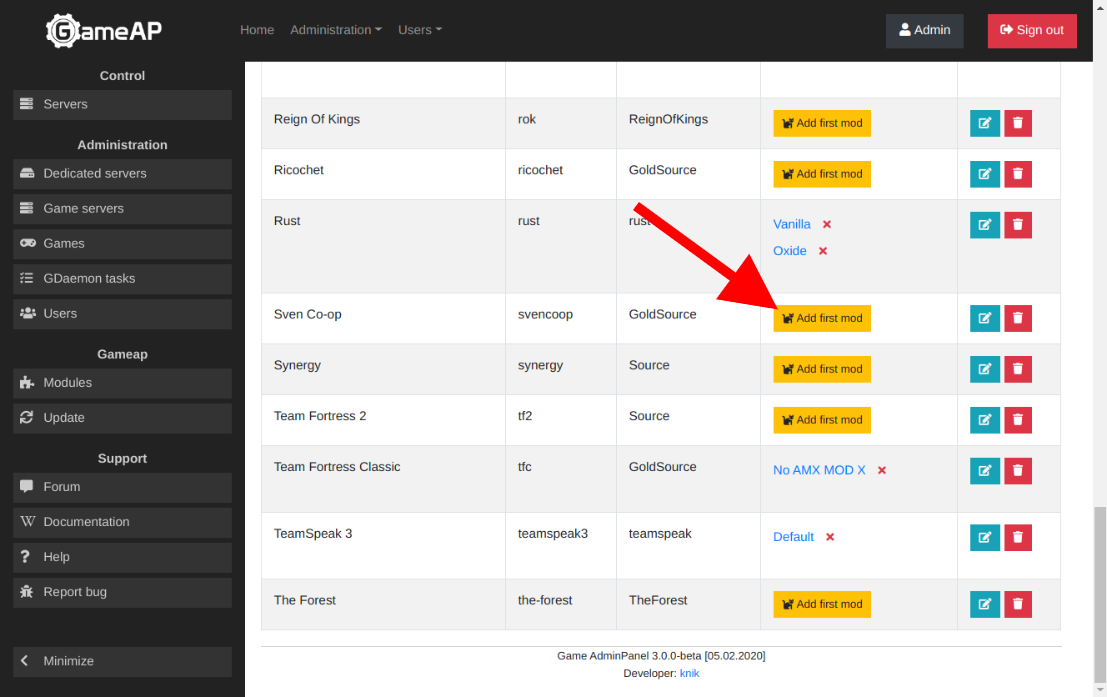
If the game already has at least one mod, then at the very top of the game list page, select “Add Mod”.
On the mod adding page, specify the mod name depending on the game mode features (GunGame, Jail, etc.), or availability of any modules (AMXX, ReAMXX for Counter-Strike, IndustrialCraft, BuildCraft for Minecraft, etc.).
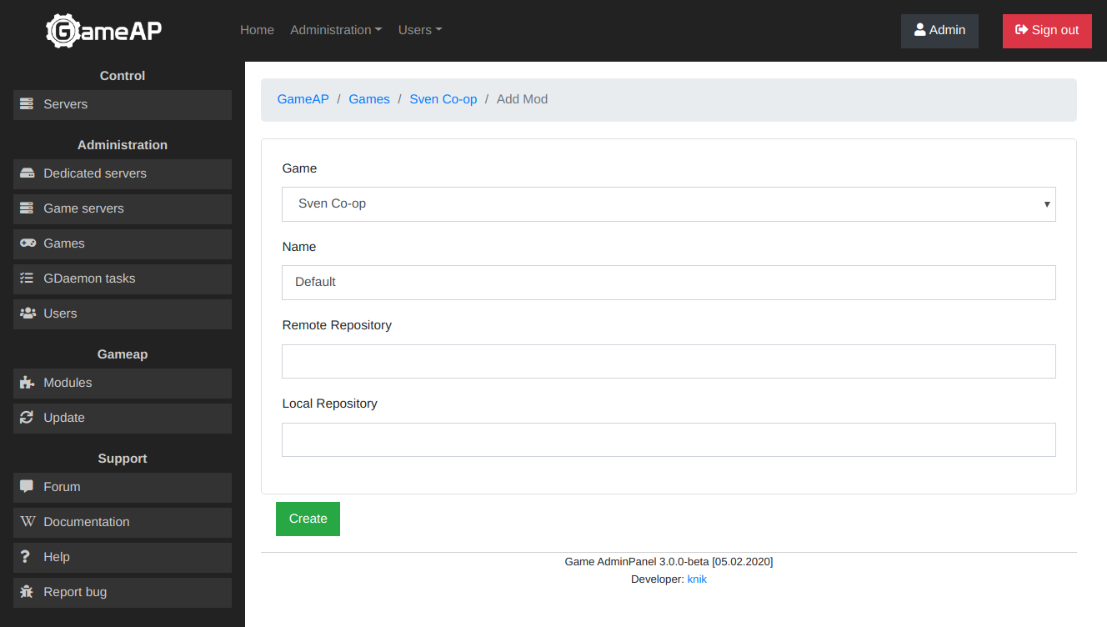
If you have an archive with additional plugins to be written over the base build, then specify the path to it in the local or remote repository fields.
In the local repository field, specify the path to the archive or directory on a dedicated server
running GameAP Daemon; path example /srv/gameap/repo/svencoop_op4_maps.tar.xz.
See details on Game Settings page.
In the remote repository field, specify the URL to the HTTP or FTP archive.
Path example https://cdn.gameap.com/svencoop/svencoop_op4_maps.tar.xz.
See details on Game Settings page.
Ready-made archives for many games live in the GameAP repository (cdn.gameap.com,
cdn.gameap.ru), but the file list cannot be browsed — directory listing is disabled and only
direct links work. It is usually easier to take the bundled game configuration with the
Upgrade games button: the URLs are already set there.
Mod configuring
After creating a mod, open it for editing. The editor has five tabs: Main, Game Servers Commands, Metadata, Vars and Fast RCON commands — they are described in Editing mods.
Start with the default start commands on the Main tab. There are two fields — Start Command (Linux) and Start Command (Windows) — and the one matching the node’s operating system is copied into every new game server of this mod. If you leave them empty, the start command of a new server is empty too, and the server will not start until you enter it by hand.
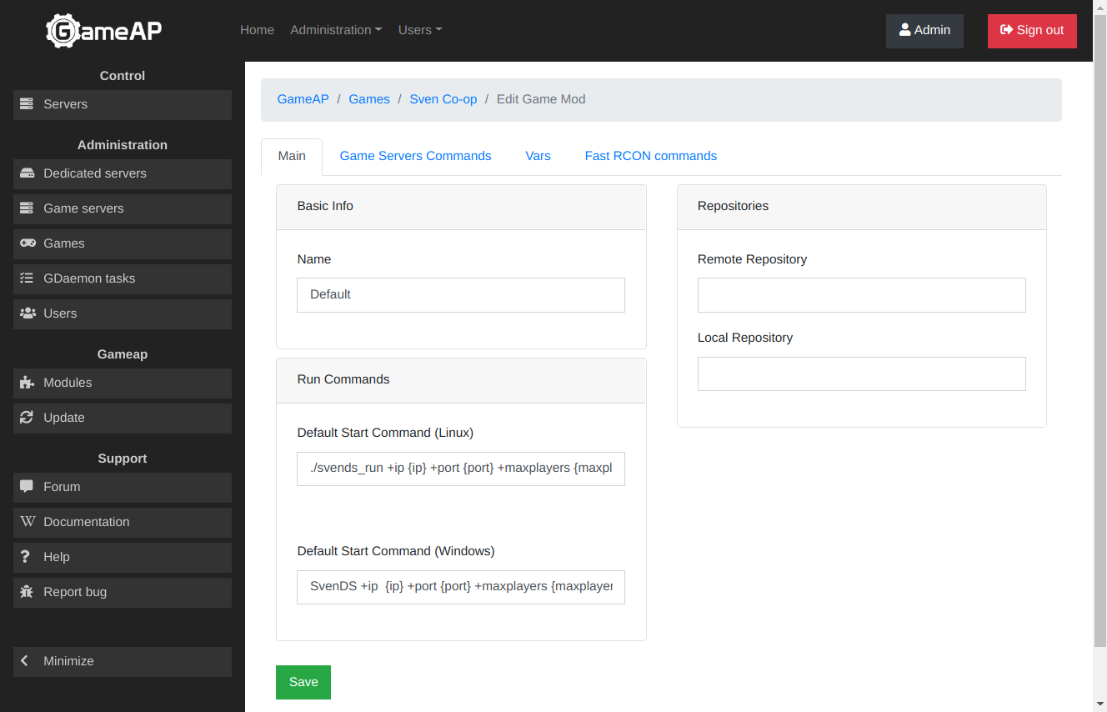
Examples of default startup commands for some Linux games:
- Sven Co-op:
./svends_run +ip {ip} +port {port} +maxplayers {maxplayers} +log on +map {default_map} - Half-Life:
./hlds_run -game valve +ip {ip} +port {port} +map {default_map} +maxplayers {maxplayers} +sys_ticrate {fps} - GTA: Multi Theft Auto
./mta-server64 -t -n --ip {ip} --port {port} --maxplayers {maxplayers}
Examples of default startup commands for some Windows games:
- Sven Co-op:
SvenDS +ip {ip} +port {port} +maxplayers {maxplayers} +log on +map {default_map} - 7 Day To Die
startdedicated.bat
Pay attention to the values in braces { and }, such as {ip}, {port}, {maxplayers}, {default_map},
{fps} and others. In GameAP, they are called shortcodes; they are replaced with server variable values.
All game servers have built-in variables, such as IP, ports, ID, UUID. Additional variables — the
maximum number of players, the default map, FPS and others — are declared in the mod settings, on the
Vars tab.
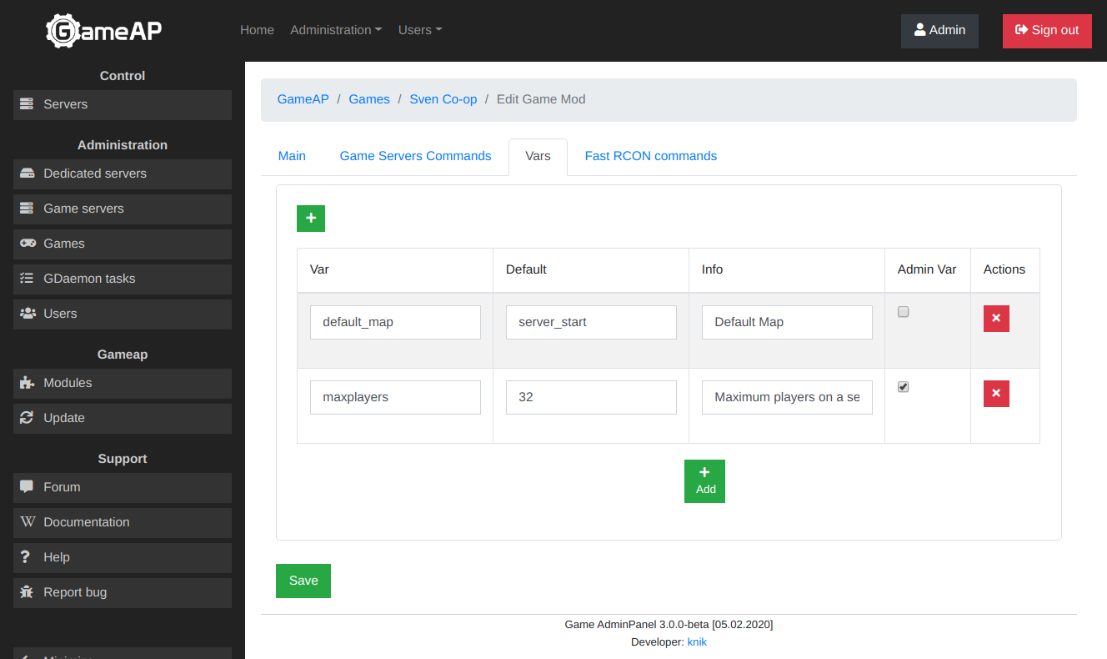
Every variable has a type — String, Text, Integer, Decimal number, Switch, Select or Password — and may carry predefined options, validation rules (required, minimum and maximum, length, regular expression) and translations of its label into the panel languages. A variable marked Admin Var is not shown to regular users at all; the rest appear in the Settings tab of every game server of this mod, where the values are changed individually. The fields are described in Variables.
The next tab, Game Servers Commands, holds the RCON commands for kicking and banning players, changing the map and so on; they are used for advanced game server administration.
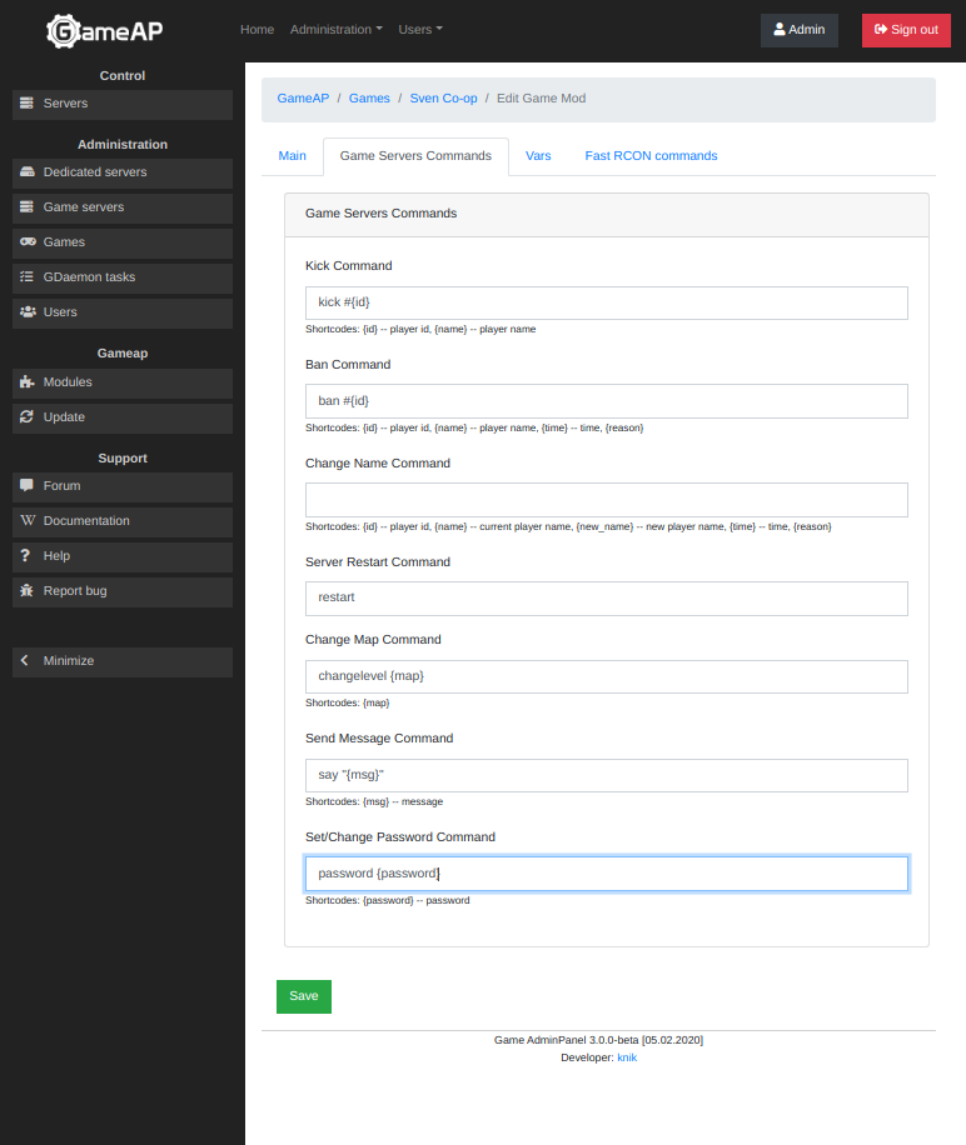
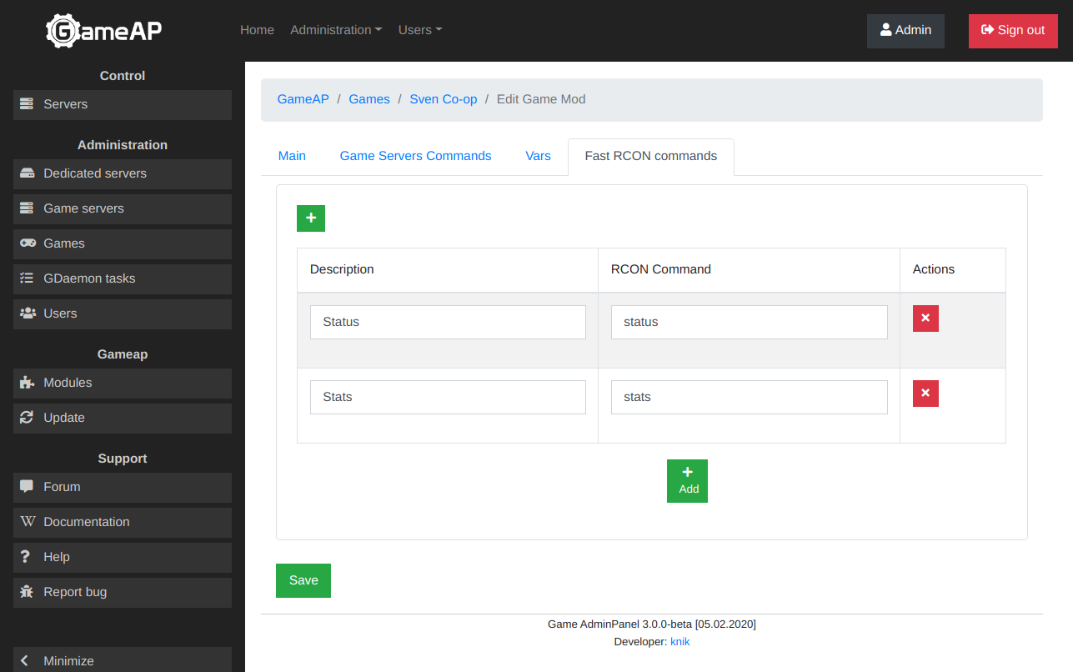
Your own RCON commands go to the Fast RCON commands tab — for example a server status or statistics command. They appear as buttons in the server’s RCON console.