
Game Servers
Game server page
Open Servers List and select a server. The page is split into tabs; which ones are present depends on the permissions granted to the user and on the game’s capabilities.
| Tab | What is on it |
|---|---|
| Control | Start, stop, restart, update, and reinstall buttons, server state, console, and statistics |
| RCON | RCON console and player management. Appears if the game supports RCON |
| Files | The server’s file manager |
| Task Scheduler | Recurring tasks: restart, update, arbitrary commands |
| Settings | Values of the mod variables for this server |
Plugins can add their own tabs to the server — they appear next to the built-in ones.
Control
The main tab. Besides the control buttons, it contains:
Server state — running or stopped, the current map and player count, if the game reports this data over the Query protocol.
Console — the game server output and a field for sending commands. It works not through RCON but through the process manager on the dedicated server, so it is available even when the server has not come up yet.
Statistics — CPU, memory, and network usage charts. The data is collected by the daemon
every metrics.collection_interval (5 seconds by default) and kept for
metrics.retention_duration (10 minutes by default), see
GameAP Daemon.
Files
The file manager works within the game server directory. It lets you view and edit files, upload and download them, create directories, and change permissions.
Uploads are checked by file type: the type is detected from the file content, not the extension.
Whether archives and binary files may be uploaded is controlled by the FILES_UPLOAD_ALLOW_ARCHIVES
and FILES_UPLOAD_ALLOW_BINARY variables, see Security.
Task Scheduler
Recurring tasks for the server: scheduled restart, update, command execution. The tasks are executed by the daemon on the dedicated server.
Settings
Values of the variables declared in the game mod — for example, the default map or the number of slots. They are substituted into the run command in place of shortcodes. Which variables are available is defined in the mod settings.
Each variable is rendered as the widget its type declares:
| Type | Widget |
|---|---|
string |
Single-line text field |
text |
Multi-line text area |
int |
Integer field with a stepper, bounded by the variable’s min and max |
float |
Number field, bounded by min and max |
bool |
Switch |
select |
Drop-down list with search. If the variable allows custom values, you can also type your own |
password |
Masked field; the value can be revealed on click |
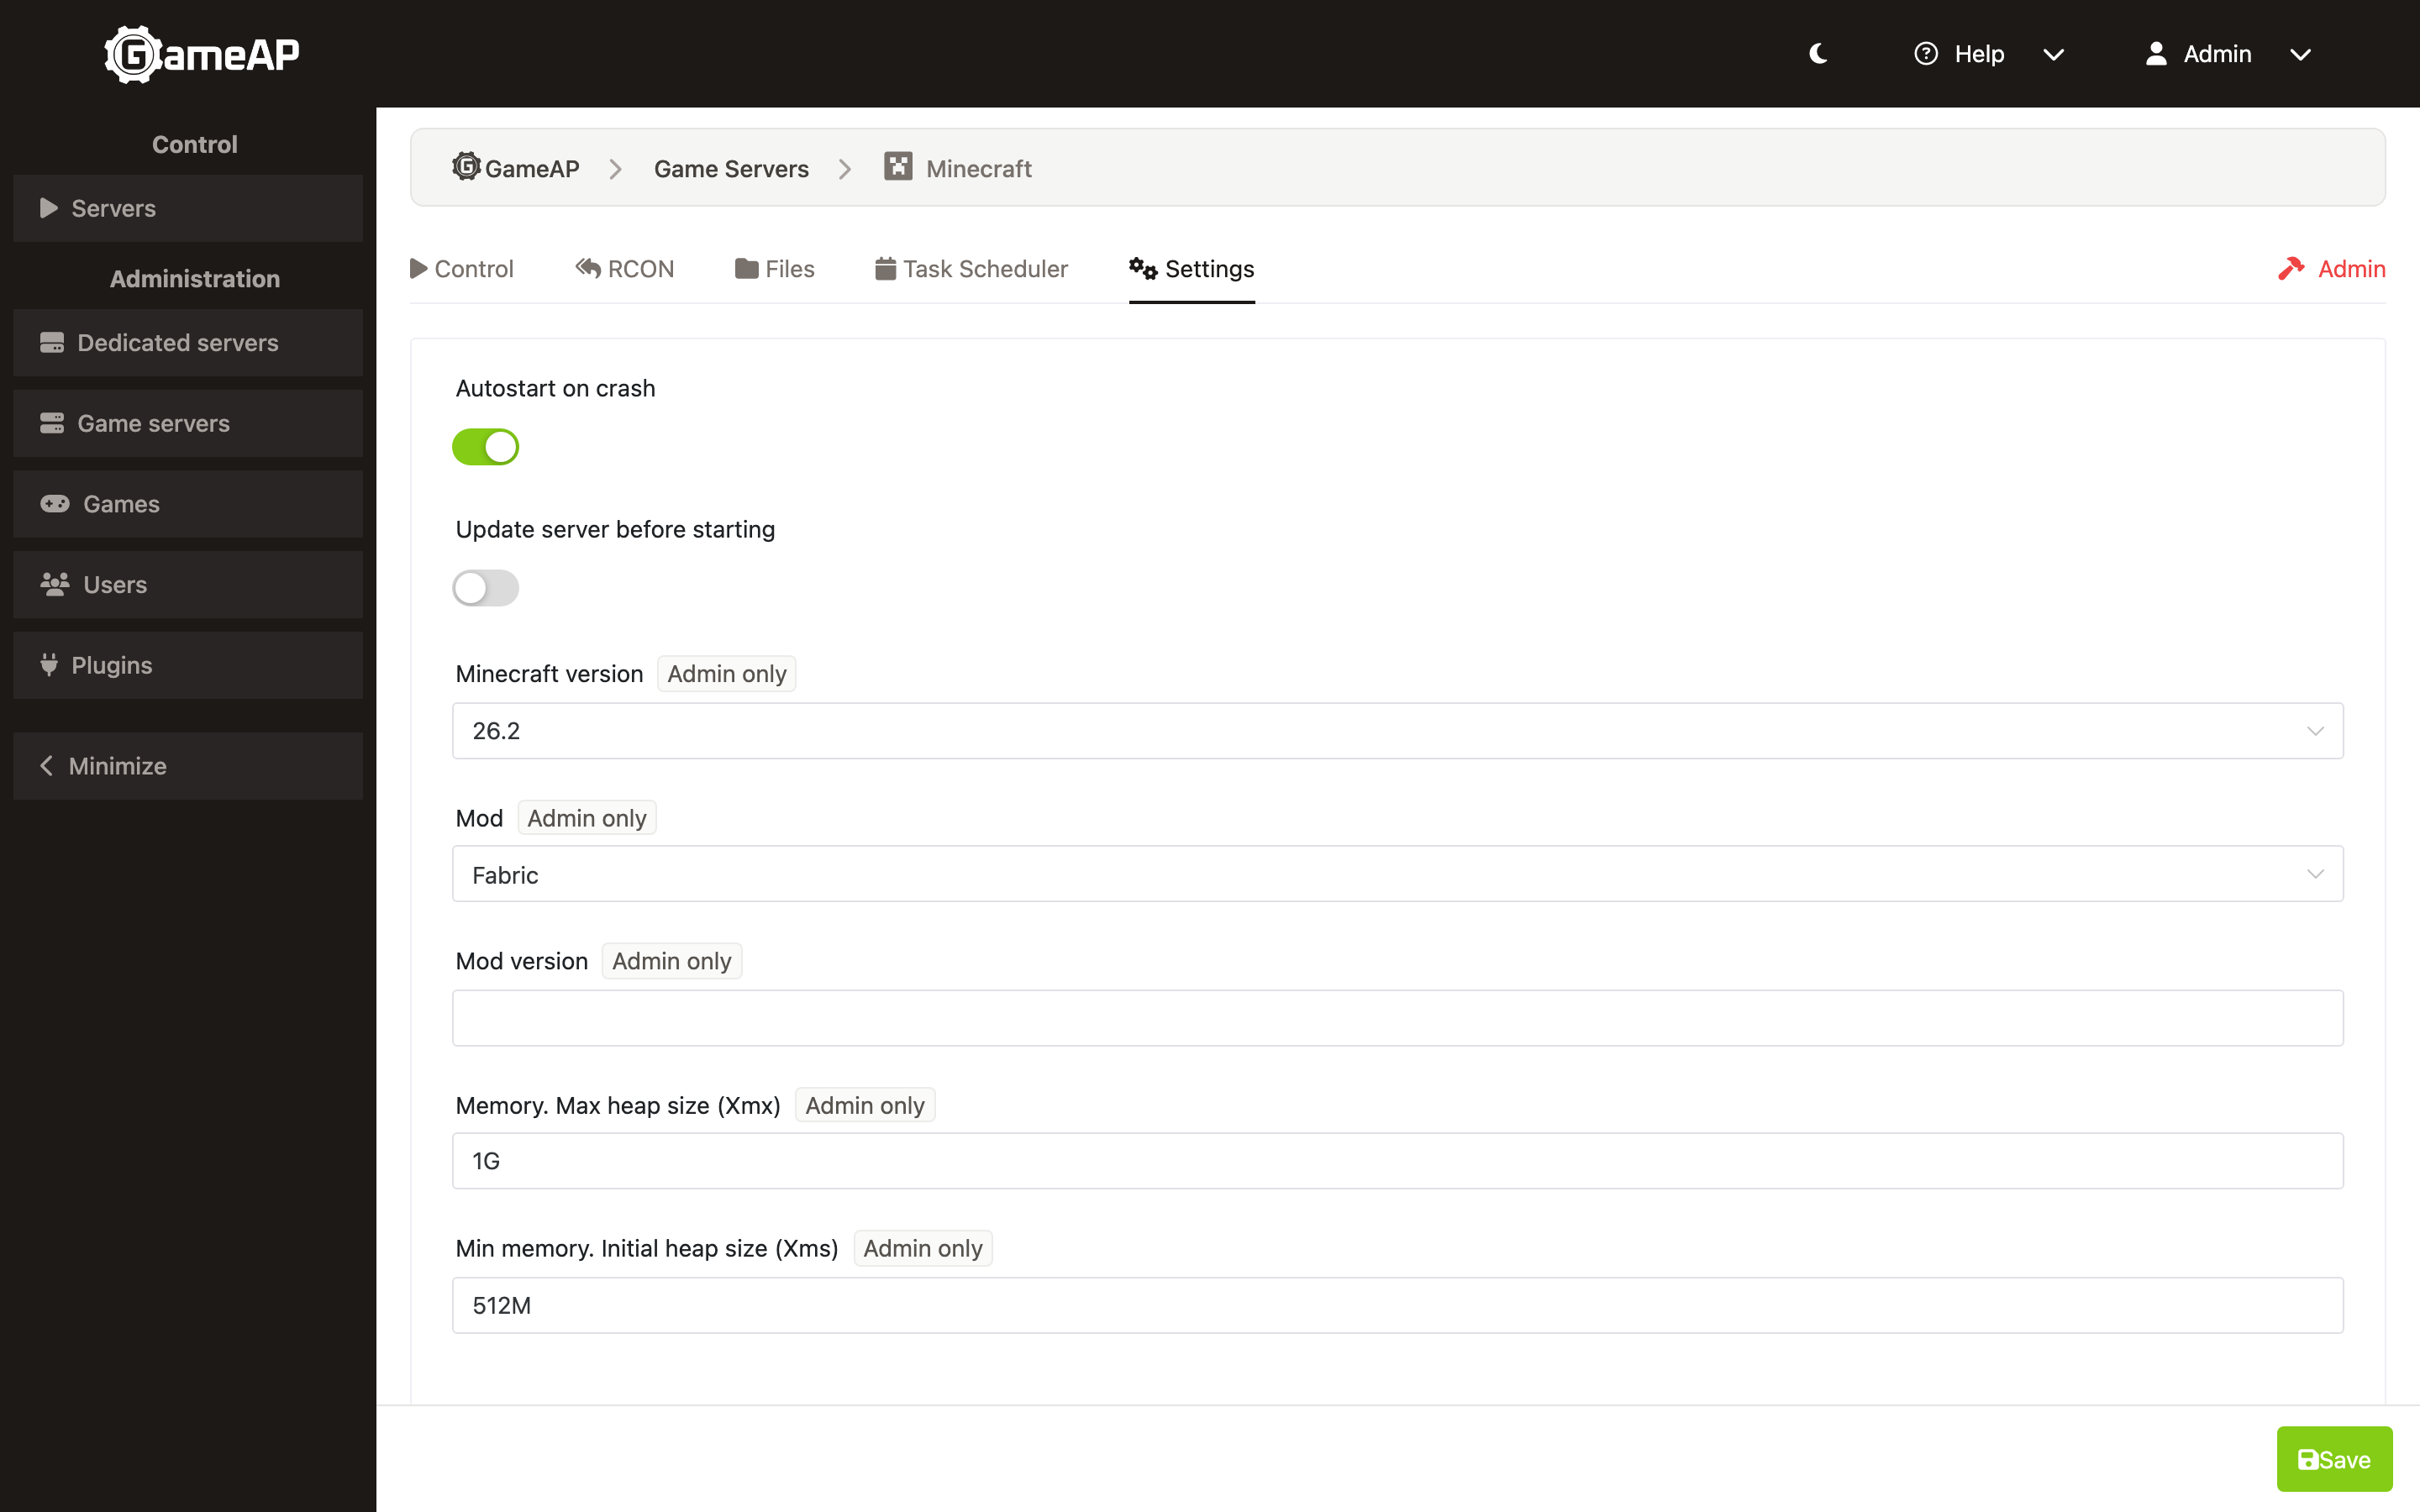
The default value is shown as the placeholder, the variable’s description as a hint under the field. Values are validated in the browser and again by the panel on save. If any value violates its rules, nothing is written: the offending fields are highlighted with the error text, and the message Please check the highlighted fields. appears.
A variable marked Admin Var in the mod is shown to administrators with the Admin only badge and is hidden from other users entirely.
Two built-in settings are always present on the tab. They belong to the panel, not to the mod:
| Setting | Key |
|---|---|
| Autostart on crash | autostart |
| Update server before starting | update_before_start |
Editing game servers
To edit a game server (node), go to “Administration” → “Game Servers” page, then select the game server you want to edit and click on the “Edit” button.
Description of parameters
Basic
Basic group of parameters
UUID
UUID is a universal unique identifier. It is generated automatically for each server. It is used as an identifier for game server processes.
Name
Server name. It can be any string value. You can enter any game server name.
Game
The game which the game server belongs to. Read the documentation for setting up games in the corresponding section — Game settings.
See also Manual for adding missing games.
Mod
The mod which the game server belongs to. The mod may determine additional settings (variables)
for the game server, such as the default map ({default_map}), FPS, and others. See the information on how
add your settings and other detailed info about this on the
game settings page.
RCON password
Password to manage the game server via RCON.
Directory
Game server directory relative to dedicated server working directory.
For example, if the directory is servers/my_server, and the dedicated server working directory is /srv/gameap, then the game
the server will be located in /srv/gameap/servers/my_server.
Username on a dedicated server
The user running the game server on the node. The default is gameap.
The user specified in this field must exist on the dedicated server.
Dedicated server, IP, ports
A group of parameters that relates to a dedicated server (VDS, node) and connection to the game server.
Dedicated server
The node the game server runs on. It is selected when the server is created; on the edit form the field is shown but cannot be changed.
IP
Game server IP or host. Examples are 127.0.0.1,my-server.gameap.ru. This is the address the
daemon connects to. To show users a different address — for example, when the node is behind
NAT — set the public_ip key in Metadata.
Server port
Main server port. Used to connect players to the server.
Query port
Server port for queries. Query is used to get general server data: current map, current number of players on the server, list of players.
In GoldSource and Source, it matches the main server port. In Minecraft, you can specify any port. On some other game servers, it may be one unit more or less.
RCON port
Server port for remote administration.
In GoldSource and Source, it matches the main server port. In Minecraft, you can specify any port. In some other game servers, it may be one unit more or less.
The server, query, and RCON ports accept any value from 1 to 65535. The panel only validates the range; the ports themselves must be open on the dedicated server.
Up to and including 4.4.1, panels running on PostgreSQL stored ports as
SMALLINTand rejected any value above 32767 with a database error. From 4.4.2 the columns areINTEGER, and the full range works on PostgreSQL, MySQL/MariaDB, and SQLite alike.
Resource limits
Limits on the game server’s resource consumption.
CPU limit
Set in millicores: 1000 is one full core, 500 is half a core. In the interface the value
can also be entered as a percentage or in cores; the panel converts it itself.
RAM limit
The maximum amount of RAM. In the interface it is entered in bytes, megabytes, or gigabytes.
The limits are applied only by process managers that support them: systemd, Docker, and Podman. With
tmux,winsw,shawl, orsimple, the configured values have no effect. See Process Managers.
An empty or zero value means no limit.
Run command
The run command is an important and required parameter for starting a game server. It is a string with various options and game server starting options. It can be individual for each game and mod.
Parameters may include shortcodes which are automatically replaced by the settings value (variables)
of specific game server. Shortcodes are words in braces { and }, for example, {ip},
{port}, {default_map} and others.
Read on how to add your own shortcodes which will be automatically replaced by the settings value, on the game settings page.
Metadata
Arbitrary key–value pairs stored with the server. The Metadata card includes a reference of the known keys with examples. They fall into two groups.
Panel keys. The reserved key public_ip overrides the address shown for the server. When it
is set, the server list and the server page show this value to everyone, administrators included,
while the daemon keeps connecting to the address from the IP field (the API returns it as
internal_server_ip). Use it for dedicated servers behind NAT whose LAN address must not be
published. The value must be a bare IP address or hostname — a value with a port is rejected with
metadata.public_ip is not a valid IP address or hostname. An empty value removes the override.
Container keys. The docker_* keys (docker_image, docker_workdir,
docker_installation_script, and others) are read by the Docker and Podman process managers on
the daemon, see Process Managers.
Sending commands to the console
A command entered in the console on the Control tab is delivered to the game server in one of two ways.
If the dedicated server has the Script Send Command template (script_send_command)
configured, the panel substitutes the command into it and executes it on the dedicated server.
If the template is not set, the command is written to the game server’s input file.
Do not put
{command}in quotes. The panel substitutes the value already quoted: before substitution the command is shell-escaped and wrapped in single quotes. Adding your own results in double escaping, and the server receives the command together with the quotes.
Correct:
tmux send-keys -t {uuid} {command} Enter
Incorrect:
tmux send-keys -t {uuid} "{command}" Enter
The template is set on the Administration → Dedicated Servers page → select the server → Edit → the Scripts tab.