
Install on Windows
Supported Versions
| Version | Supported |
|---|---|
| Server 2025 | ✔ |
| Server 2022 | ✔ |
| Server 2019 | ✔ |
| 11 | ✔ |
| 10 | ✔ |
Downloading GameAP Control
You need to download the GameAP Control utility (gameapctl) to manage the GameAP environment.
For this, go to the gameapctl release page on Github: https://github.com/gameap/gameapctl/releases
Select the latest release and click on it.
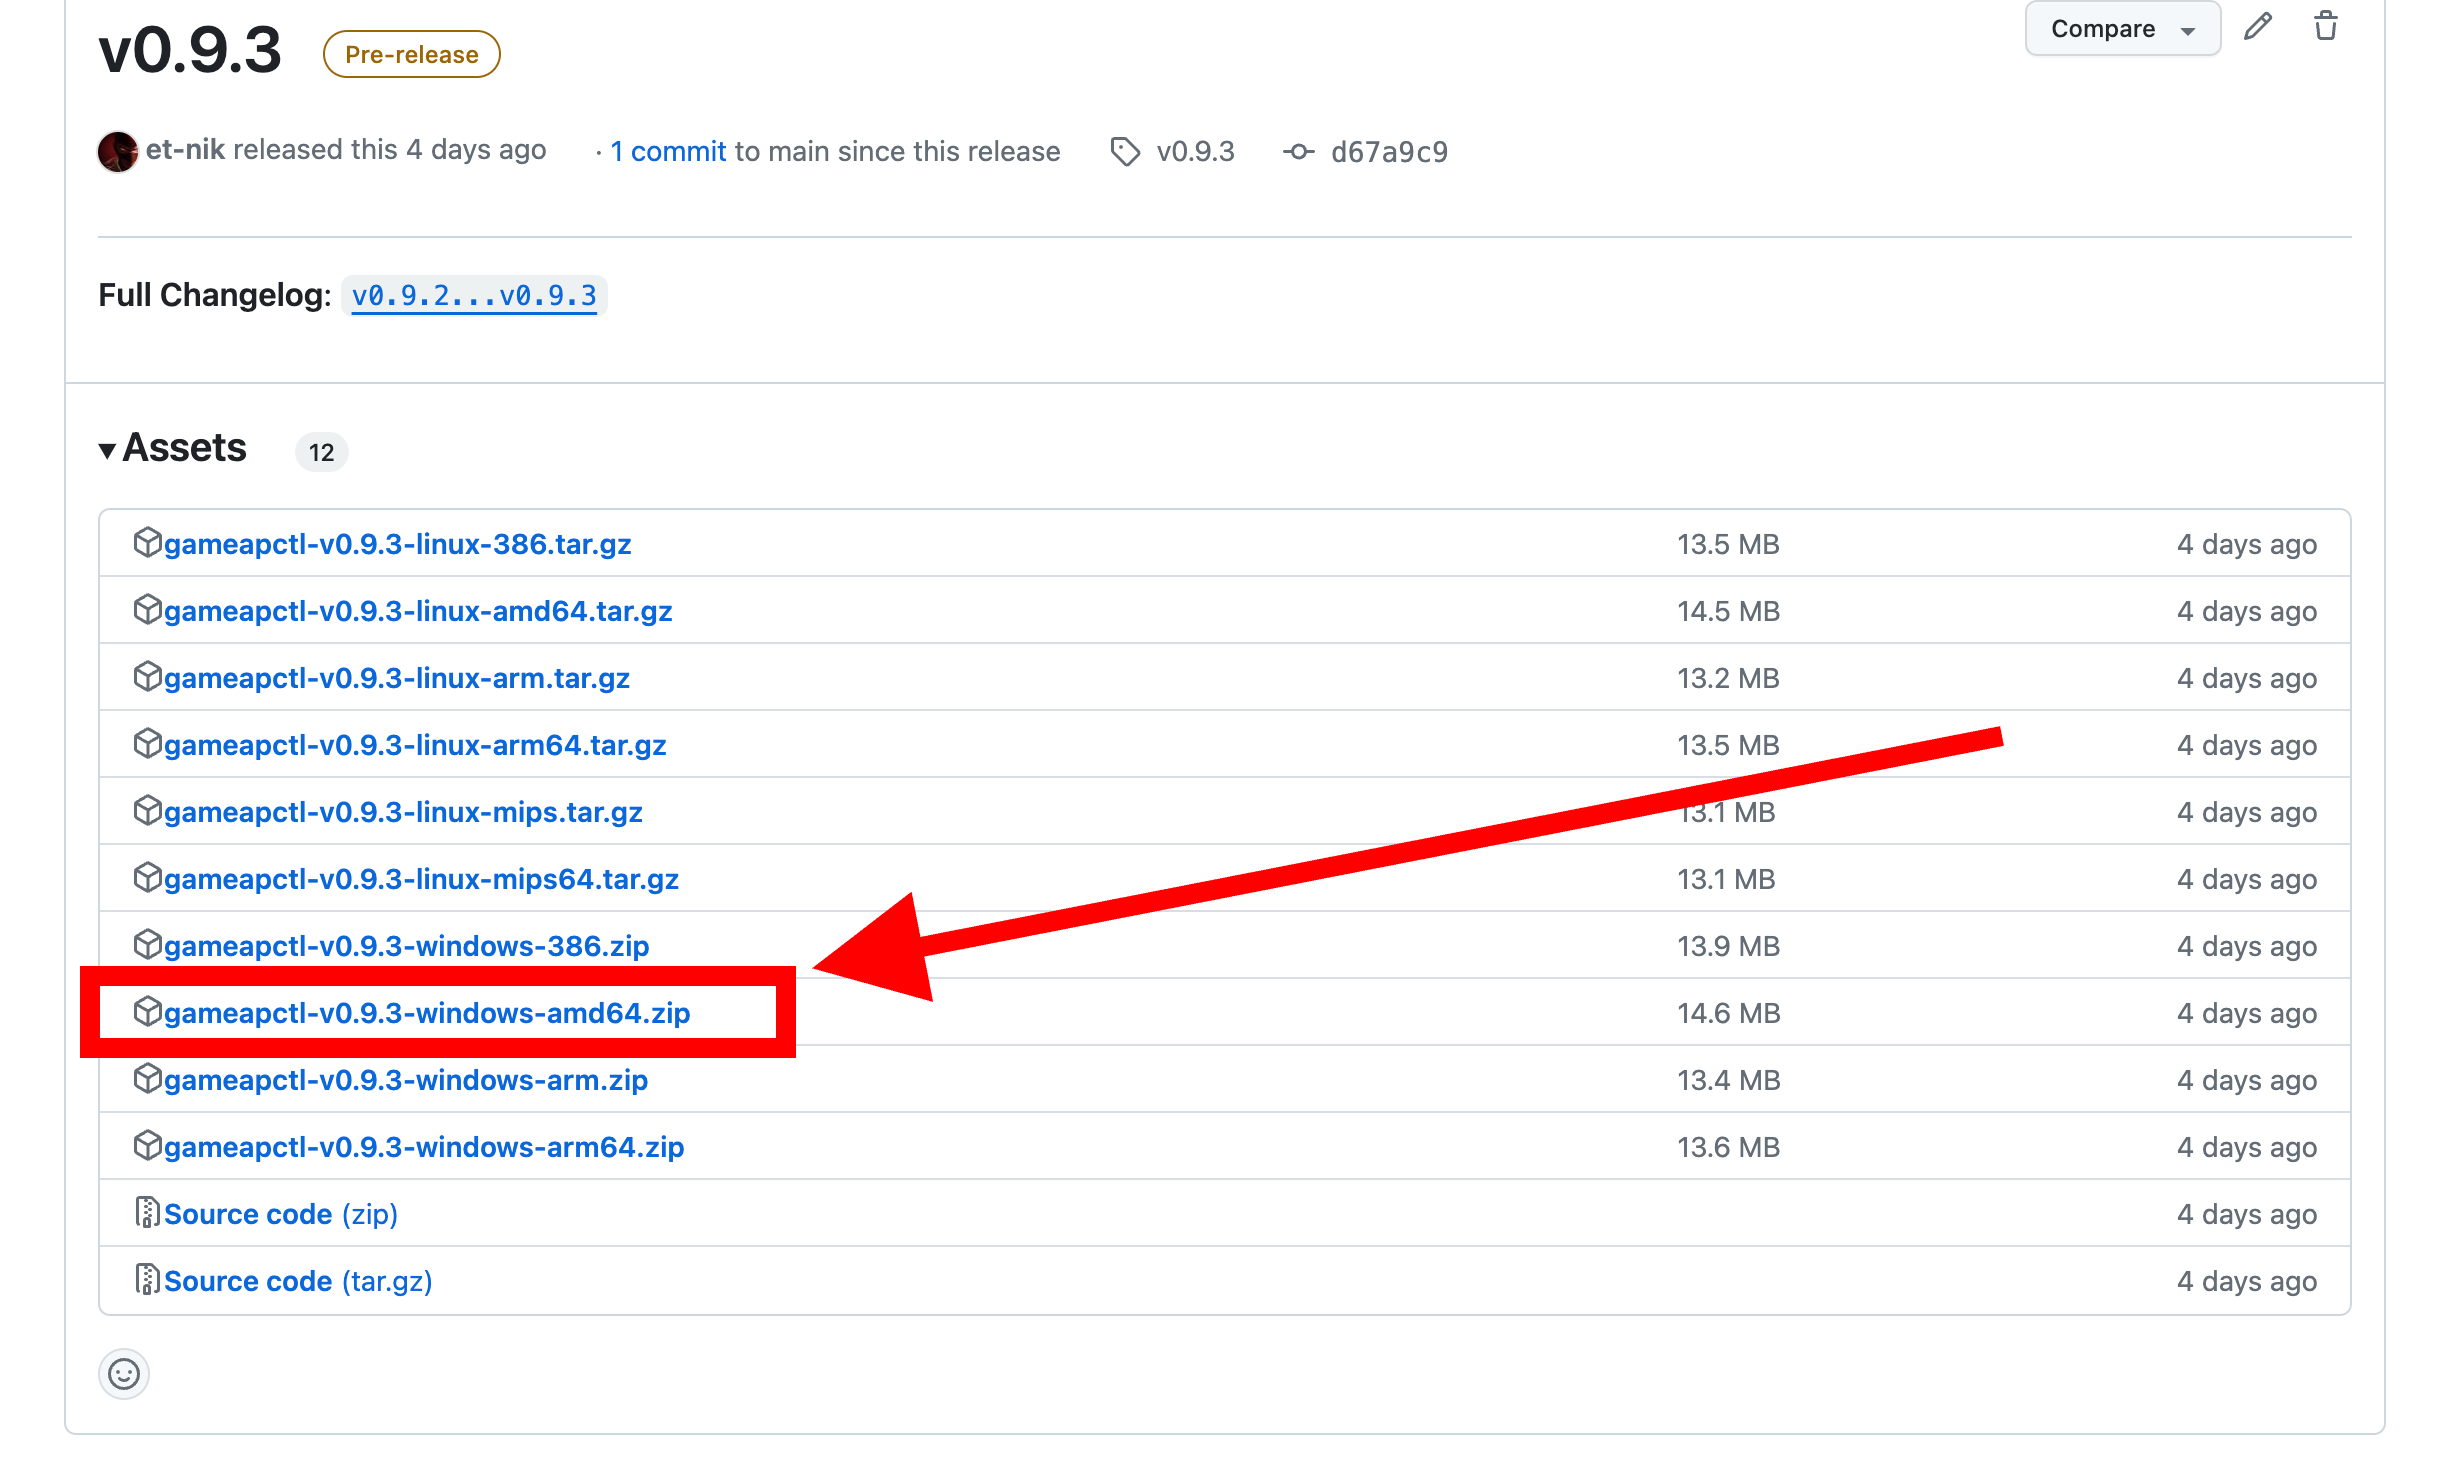
After that, find the version suitable for you. The most popular architecture is Windows AMD64, so you will most likely need to download this archive:
Installing the Panel Using GameAP Control UI
After downloading the gameapctl archive, run it.
A browser window will open, in which you need to click “Install” in the Web/API section.
The gameapctl interface installs and upgrades the ready-made release build; it has no option to build from source. To build the panel from source on Windows, use the command line:
gameapctl.exe panel install --github, optionally with--branch=<branch>. gameapctl installs Go and Node.js on its own; the notes on the Go toolchain and on later upgrades in Develop Version apply here as well.
Installation Parameters
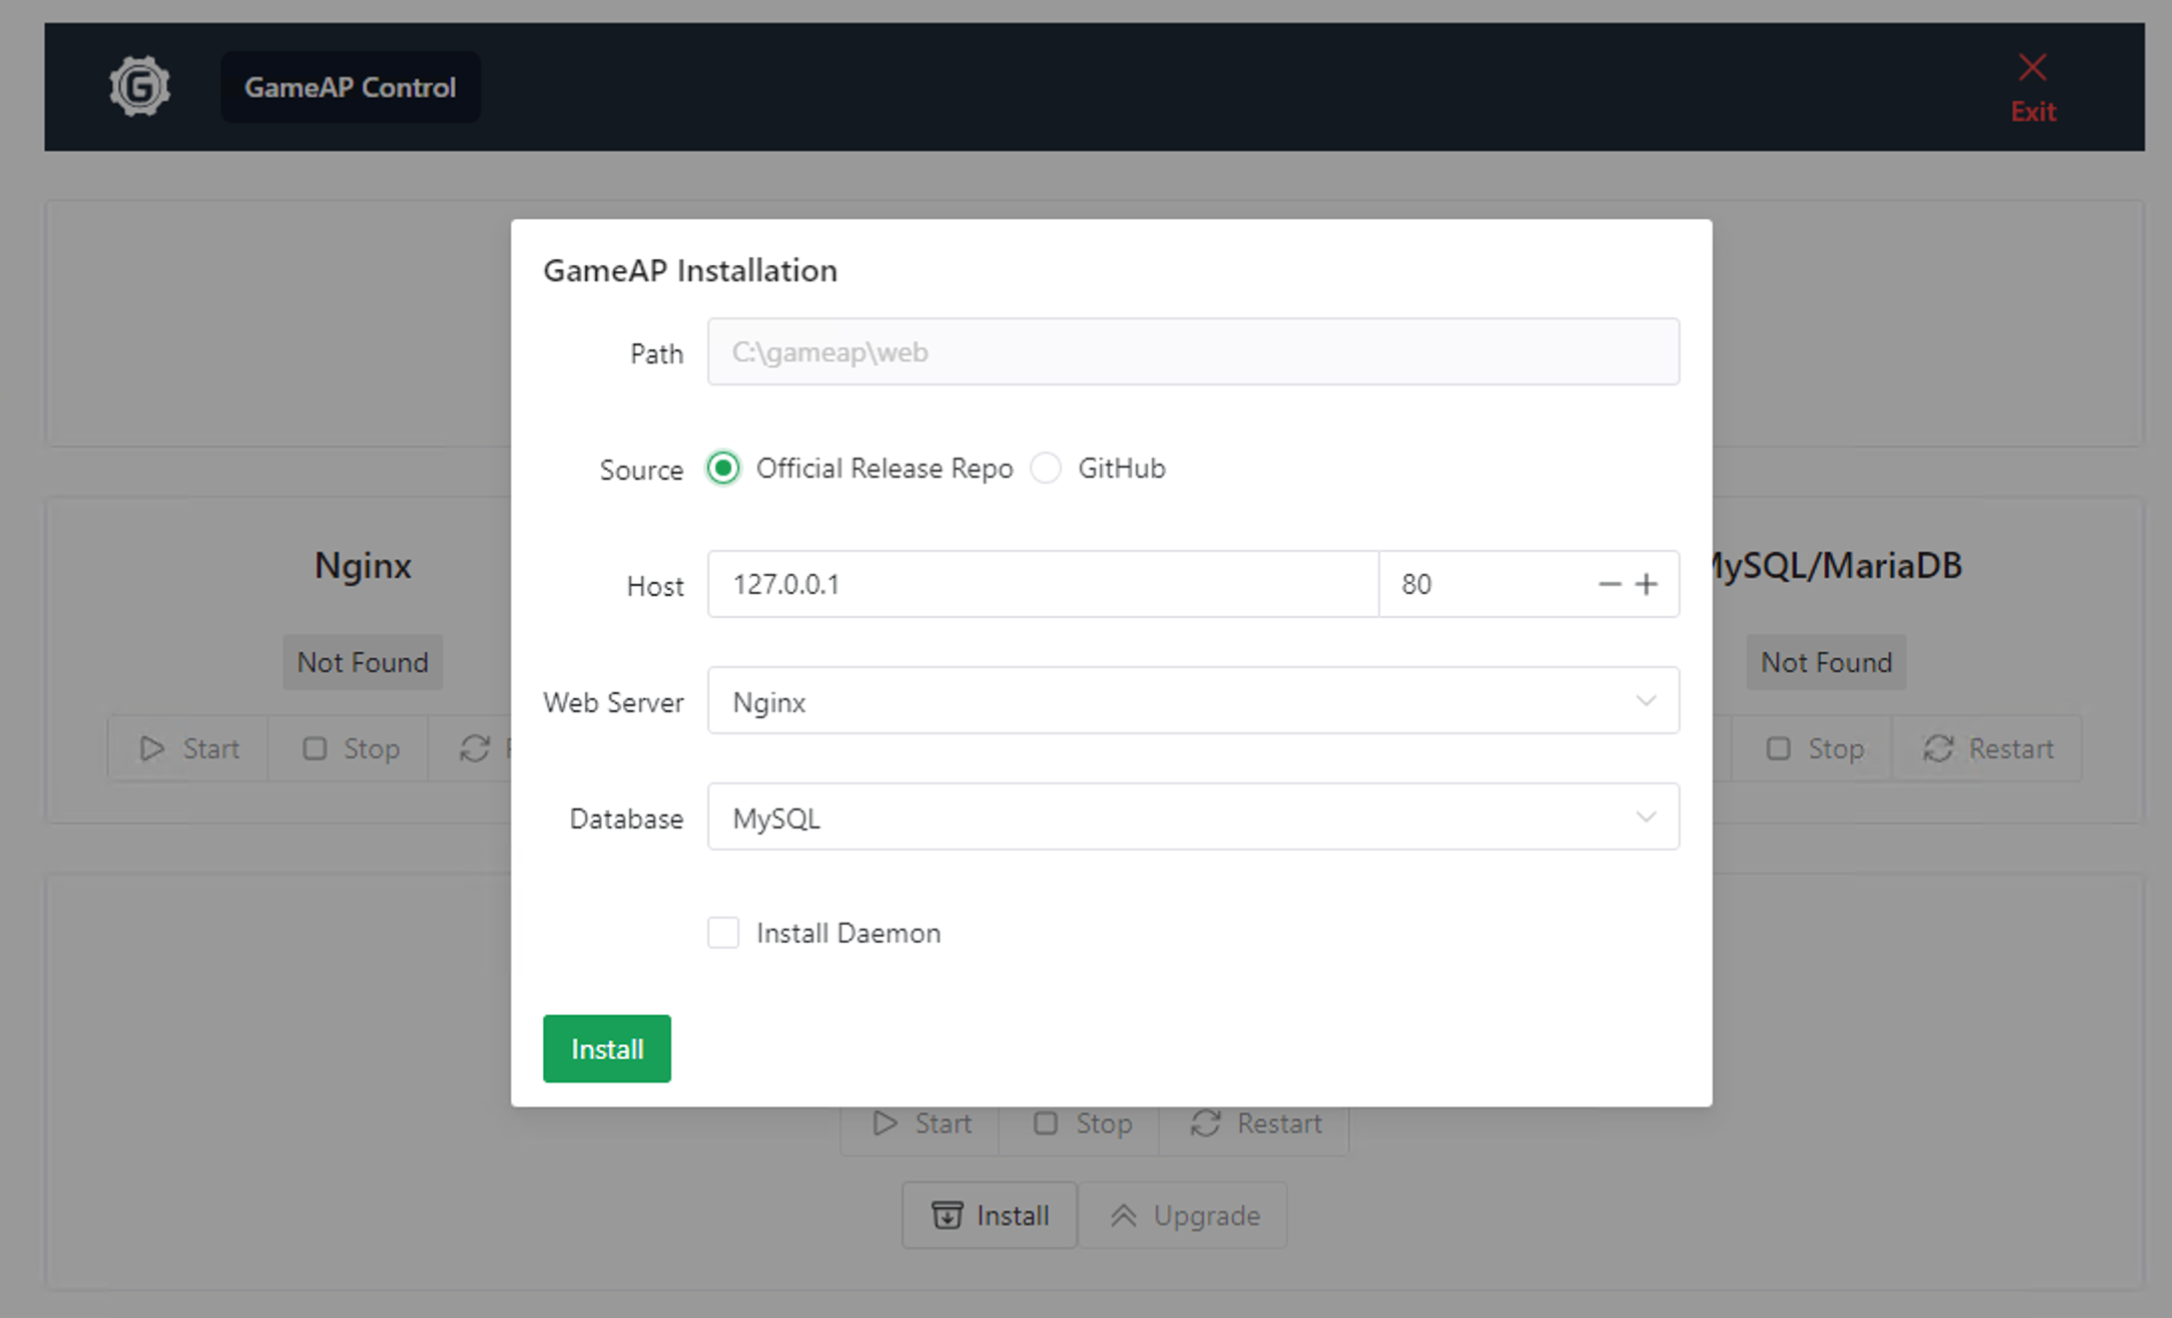
Specify the necessary data for installation.
Host
Specify the domain or IP address where the panel will be accessible.
In the case of an IP address, it must be the address assigned to the network interface on the VDS. If your network uses NAT, do not specify the external IP, but the internal one, then configure port forwarding.
Any domain can be specified, but do not forget to configure DNS.
Correct value examples:
- 10.182.104.8
- 10.182.104.8:2080
- example.com
- http://example.com
Database
The database where data will be stored: users, server information, etc. On Windows the installer pre-selects SQLite; the other options remain available:
- SQLite. Selected by default. Enough if the load on your server is expected to be low and you do not plan to use more than 10 game servers.
- PostgreSQL. Recommended for large projects with many game servers and users.
- MySQL/MariaDB
Installing GameAP Daemon
In addition to the Web panel, you can also install the GameAP Daemon server part, which handles game server operations.
Completion of Installation
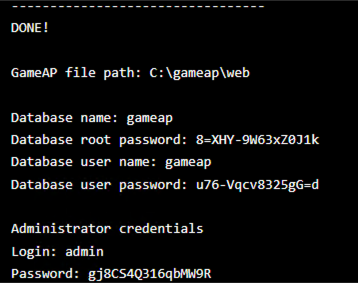
Wait for the installation to finish. Some stages may take a considerable amount of time.
Do not forget to save the login data and database information that will be provided at the end.
HTTPS
One command switches the panel to HTTPS with a self-signed certificate:
C:\path\to\gameapctl.exe panel https enable
The certificate and key are stored in C:\gameap\web\certs. Being self-signed, the certificate
is not trusted by browsers until it is added to the trust store of every machine that opens the
panel. Flags, a certificate of your own, and Let’s Encrypt are described on the
HTTPS and Certificates page.