
Dedicated Servers
New dedicated server
When getting started with the panel, you should add a dedicated server (VDS/VPS, container, physical server) to run GameAP Daemon on.
Go to the “Administration” → “Dedicated Servers” page and click the “Create” button. A window opens with a ready-made installation command — separate ones for Linux and for Windows.
Certificates are created and passed to the daemon by the panel itself: there is no need to generate and sign them manually.
The panel builds the command from the address in the browser’s address bar (behind a reverse proxy —
from the X-Forwarded-Host header) unless GRPC_EXTERNAL_HOST is set. If that address is not covered
by the panel’s gRPC certificate — the panel is behind NAT, a reverse proxy or in Docker — the command
is still shown, but a daemon connecting through it would fail TLS verification. The panel records a
warning in its log and in the warnings field of the GET /api/nodes/setup response; the Create
window does not display it. gameapctl checks the address before installing — see
If the installation fails and GRPC API.
The setup key is valid for 1 hour and is single-use — it is revoked once the daemon has successfully registered. The key is shared across the whole panel, so reopening the “Create” window issues a new key, and a previously copied command stops working.
What you need on the dedicated server
- Superuser rights (root on Linux, administrator on Windows).
- Outgoing access to the panel on port 31718/TCP — the daemon uses it to talk to the panel over gRPC. This is the only panel port a running daemon needs.
- Outgoing access to
github.comandapi.github.com— gameapctl and the daemon itself are downloaded from there. - For the Linux script:
curl,tarandinstallinstalled. - Architecture:
amd64,arm64,386orarm.
Port 8025 is the panel web interface and API. It is needed by the administrator’s browser and by
the curl command in the installation one-liner, but a running daemon does not require it.
Port 31717 is what the daemon reports as its own during registration. In GameAP 4 the panel does not establish incoming connections to the daemon, so there is no need to open this port on the dedicated server.
Installation on Linux
Copy the command from the Linux tab and run it on the dedicated server as root:
bash <(curl -fsSL 'https://your-panel/nodes/setup/zItWHWlI4RKPl9ZsYc3y3WgdKq7mNvBx')
The script checks the environment, installs gameapctl into /usr/local/bin (or updates it if it is
already installed), and then runs gameapctl daemon install. That installs GameAP Daemon, creates the
gameap user, installs SteamCMD, registers the daemon in the panel and starts it as the
gameap-daemon systemd service.
The command must be run as root, not through sudo: the bash <(...) process substitution does not
survive sudo, and the script will stop with an error. If you are not working as root, download the
script to a file and run it:
curl -fsSL 'https://your-panel/nodes/setup/zItWHWlI4RKPl9ZsYc3y3WgdKq7mNvBx' -o gameap-setup.sh
sudo bash gameap-setup.sh
Installation paths:
| Item | Path |
|---|---|
| Daemon | /usr/bin/gameap-daemon |
| Configuration | /etc/gameap-daemon/gameap-daemon.yaml |
| Certificates | /etc/gameap-daemon/certs |
| Working directory | /srv/gameap |
| SteamCMD | /srv/gameap/steamcmd |
| Logs | /var/log/gameap-daemon/output.log |
Installation on Windows
There is no PowerShell one-liner, installation is done through gameapctl:
- Download the gameapctl archive for your architecture from the
gameapctl releases page. The archive is named
gameapctl-<version>-windows-amd64.zip. - Unpack the archive and run
gameapctl.exe. - In the GameAP Daemon section click Install.
- Paste the string from the Windows tab in the panel into the Connect URL field.
- Click Install.
The same can be done with a command in the console:
gameapctl daemon install --connect=grpc://your-panel:31718/zItWHWlI4RKPl9ZsYc3y3WgdKq7mNvBx
Installation paths:
| Item | Path |
|---|---|
| Daemon | C:\gameap\daemon\gameap-daemon.exe |
| Configuration | C:\gameap\daemon\gameap-daemon.yaml |
| Certificates | C:\gameap\daemon\certs |
| Working directory | C:\gameap |
| SteamCMD | C:\gameap\steamcmd |
| Logs | C:\gameap\daemon\logs\output.log |
The daemon is registered as the GameAP Daemon service.
Advanced installation settings
The creation window has a collapsible “Advanced Settings” block:
- Process manager — what should manage game server processes. On Linux
systemd,docker,podman,tmuxandsimpleare available, on Windows —winsw,shawlandsimple. Selected automatically by default. See details on the Process Managers page. - GitHub — build the daemon from source instead of using a ready-made release.
- Branch — repository branch, if the daemon is built from source.
Building from source requires git and Go on the dedicated server; gameapctl installs both itself
(Go 1.26.1). GameAP Daemon 4.1.2 declares go 1.26.5 in its go.mod, so go build downloads the
required toolchain automatically — besides github.com, the server needs outgoing access to the Go
module proxy (proxy.golang.org). For a regular installation leave GitHub off and use the release
build.
The panel appends the selected values to the installation command:
bash <(curl -s '...') --config='process_manager.name=docker' --github --branch=master
Manual installation
If the automatic script does not fit — a non-standard distribution, your own package installation rules, installation into a prepared image — the daemon can be registered manually.
- Download the
gameap-daemonbinary for your platform from the daemon releases page and place it on the dedicated server. - Open the “Create” window in the panel and take the connect URL of the form
grpc://host:port/keyfrom the Windows command. - Run the registration:
gameap-daemon enroll --connect=grpc://your-panel:31718/zItWHWlI4RKPl9ZsYc3y3WgdKq7mNvBx
The daemon connects to the panel, creates a dedicated server record in it, receives the certificates
(ca.crt, server.crt, server.key with 0600 permissions in a directory with 0700 permissions)
and writes the configuration file.
| Flag | Linux default | Windows default | Purpose |
|---|---|---|---|
--connect |
— | — | Connect URL. Required |
--config-path |
/etc/gameap-daemon/gameap-daemon.yaml |
C:\gameap\daemon\gameap-daemon.yaml |
Where to write the configuration |
--certs-dir |
/etc/gameap-daemon/certs |
C:\gameap\daemon\certs |
Where to save the certificates |
--work-path |
/srv/gameap |
C:\gameap |
Game servers working directory |
--steamcmd-path |
/srv/gameap/steamcmd |
C:\gameap\steamcmd |
SteamCMD directory |
--listen-ip |
0.0.0.0 |
0.0.0.0 |
IP the daemon reports about itself. With 0.0.0.0 it is detected automatically |
--listen-port |
31717 |
31717 |
Port the daemon reports about itself |
The
enrollcommand overwrites the configuration file completely — without merging with existing settings and without a backup. If the daemon has already been configured, save the configuration beforehand.
After registering the daemon you should register it as a system service and start it yourself.
If the installation fails
| Message | Cause |
|---|---|
This script must be run as root. |
The script was not run as root. Download it to a file and run it through sudo, as shown above |
Error: 'curl' is required but not installed. |
The server does not have curl, tar or install. Install the missing package and try again |
Unsupported architecture: ... |
There are no ready-made builds for the server architecture |
Failed to detect latest gameapctl version |
No access to api.github.com, or the GitHub API limit is exhausted (60 requests per hour from one address). Wait or install gameapctl manually |
cannot reach gRPC server at ... |
Port 31718 of the panel is not reachable from the dedicated server. Check the firewall and the panel address — see GRPC API |
WARNING: the panel gRPC certificate does not cover host "..." |
The address in the command is not in the panel’s gRPC certificate, but gameapctl found another address of the same panel that is covered and registered the daemon through it (using ... instead). The daemon works, but connects to a different address than the one the panel handed out. To keep the original address, set GRPC_EXTERNAL_HOST in the panel configuration and restart the panel — its gRPC certificate is regenerated automatically |
host "..." is not in the panel gRPC certificate ... |
The address is not covered by the certificate and no working alternative was found (no working alternative address was found); installation stops. Set GRPC_EXTERNAL_HOST, restart the panel and copy a new command from the Create window — see GRPC API |
The link returns 403 |
The setup key has expired or has been reissued. Open the “Create” window again and copy the new command |
Editing dedicated servers
The Administration → Dedicated servers page shows the dedicated servers (nodes) as cards. The toolbar has three buttons: Create, GDaemon Tasks and Client Certificates. Since 4.5.0 the GDaemon task list is opened from here — it is no longer a separate sidebar item.
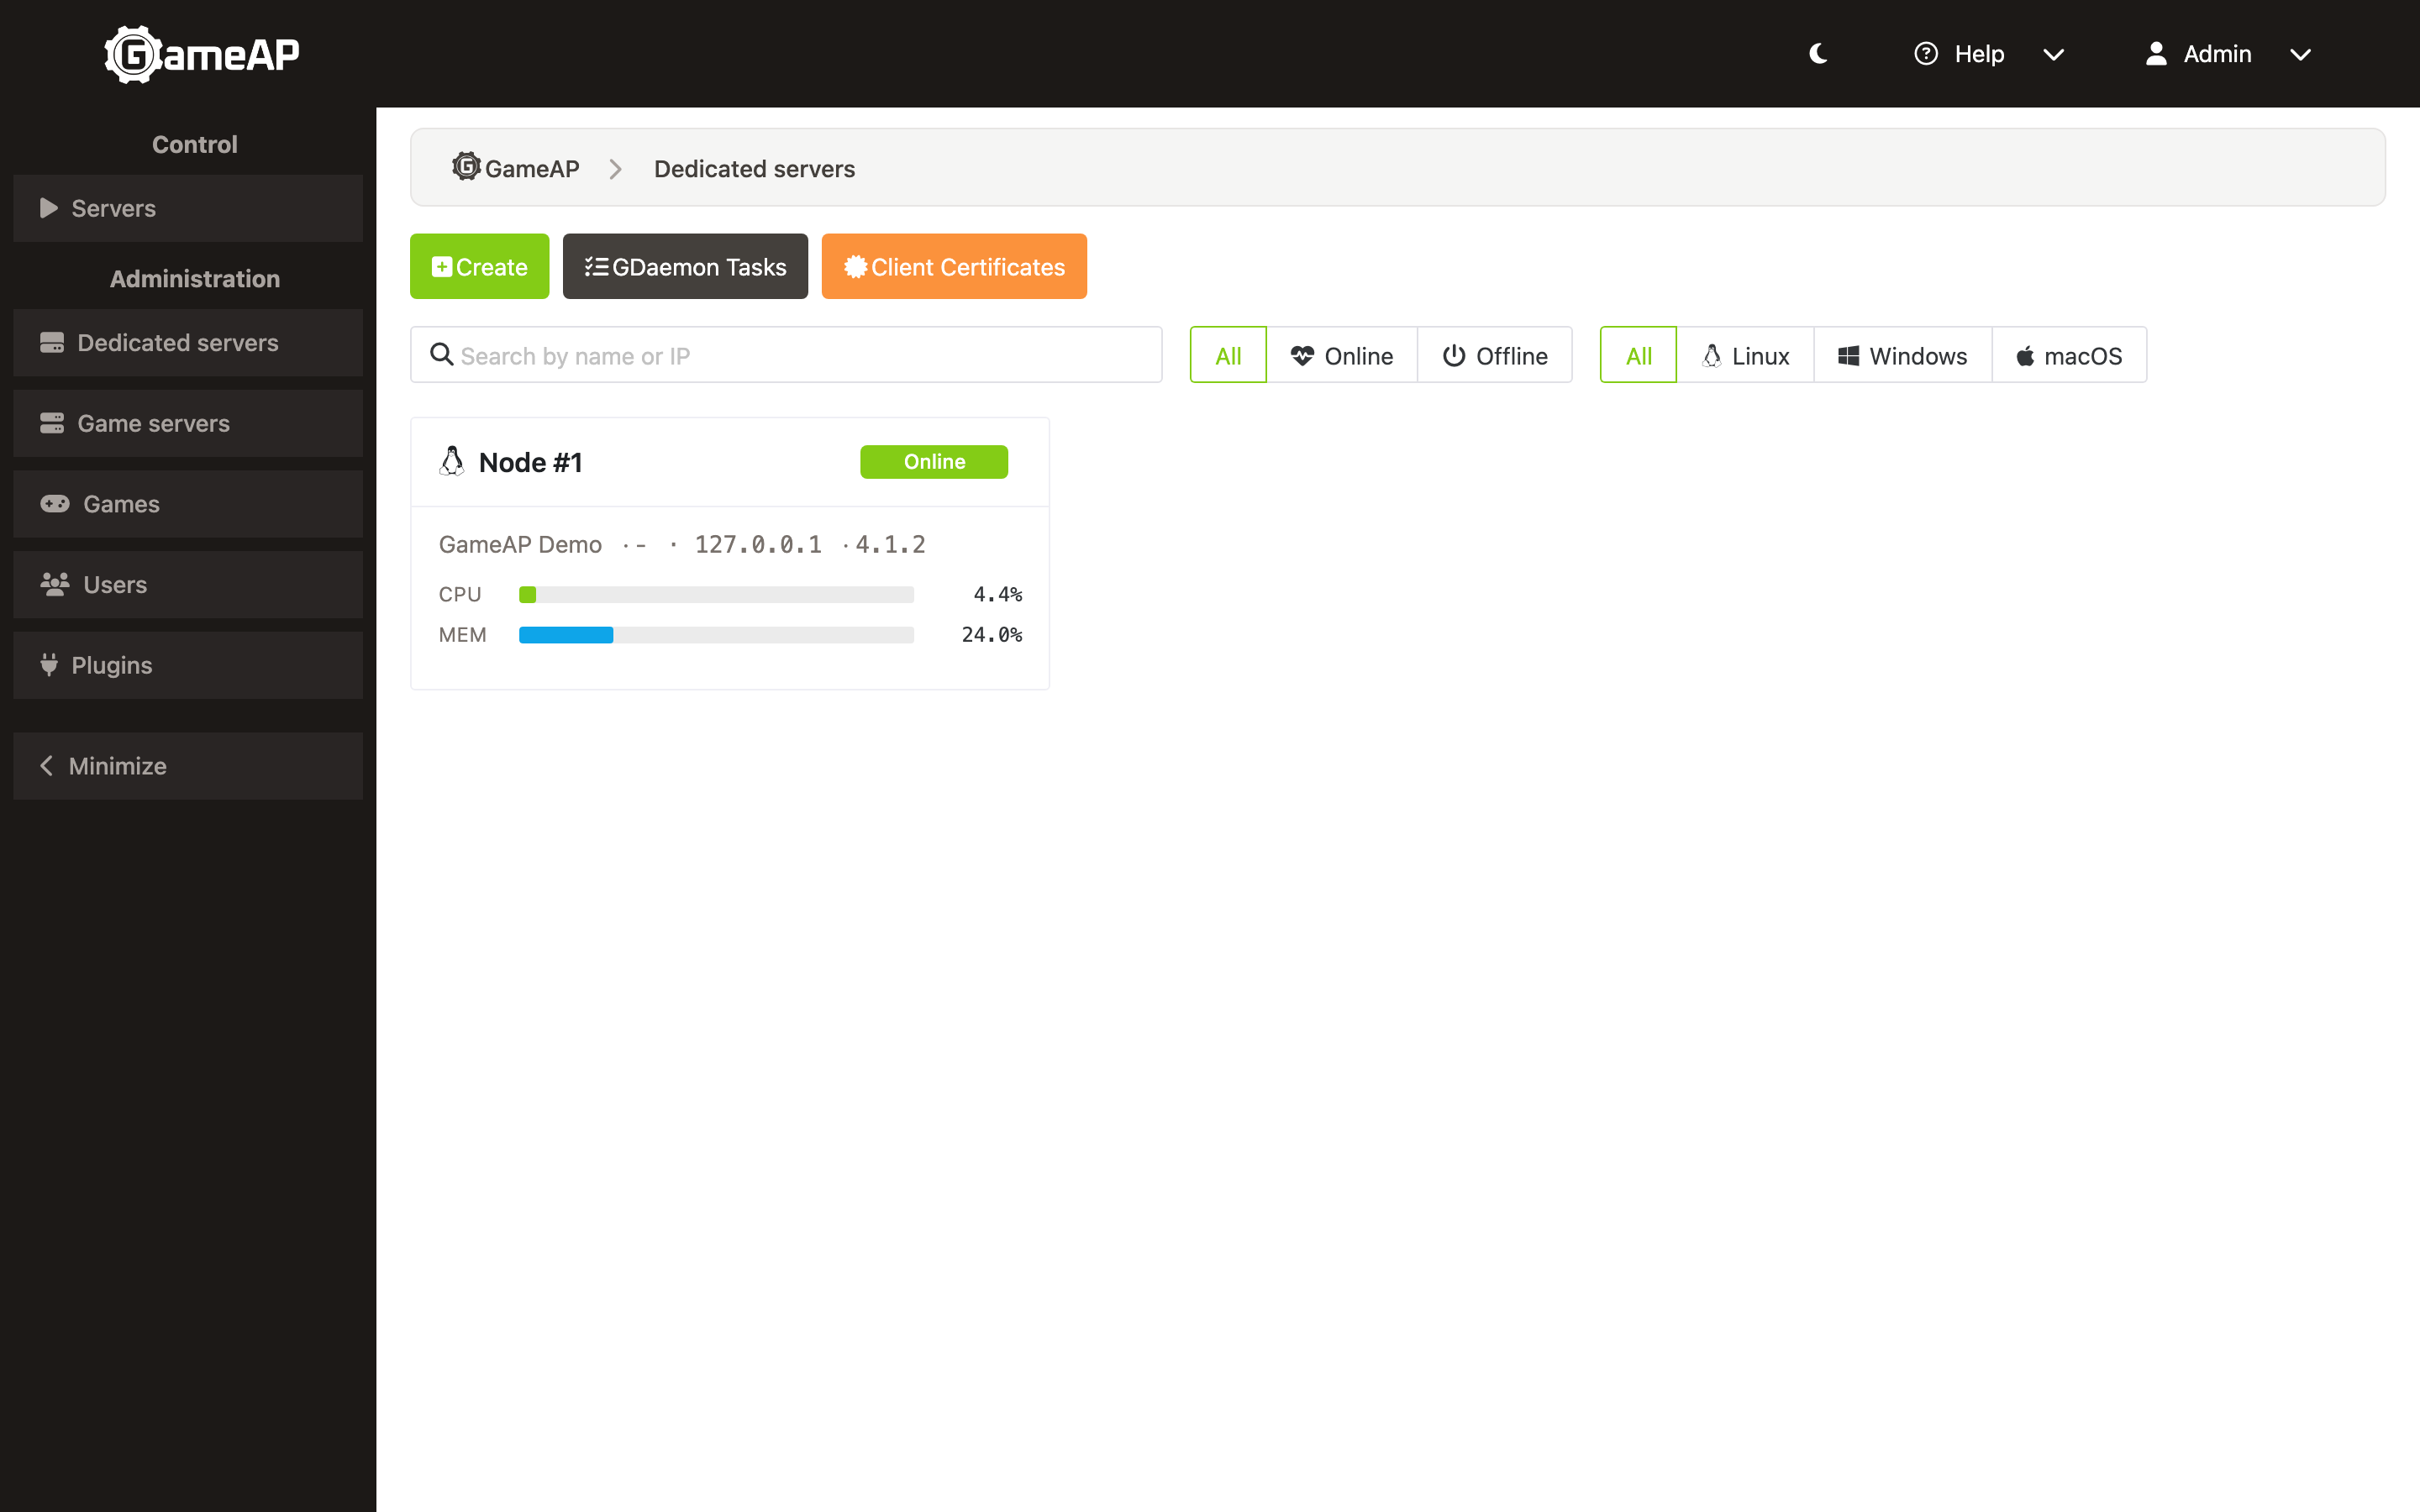
A card shows the name, the Online/Offline status, the location, the provider, the first IP
address, the daemon version and — for an online node — the CPU, memory and network load. Clicking a
card opens the details window with the Overview and Metrics tabs and the buttons Edit,
GDaemon Tasks (the task list filtered by this node, ?node=<id>), Download certificates and
Delete.
The edit form has four tabs: Main, Daemon, Scripts and Metadata.
Daemon version
The card shows the version reported by the daemon. If it is older than the latest stable GameAP Daemon
release, the card shows version → latest, where the newer version is an orange link to the release.
The Overview tab of the details window shows GameAP Daemon version with the build date; an
outdated daemon gets the New GameAP Daemon version available banner with a link to the release, an
up-to-date one — a green check mark with the tooltip GameAP Daemon is up to date.
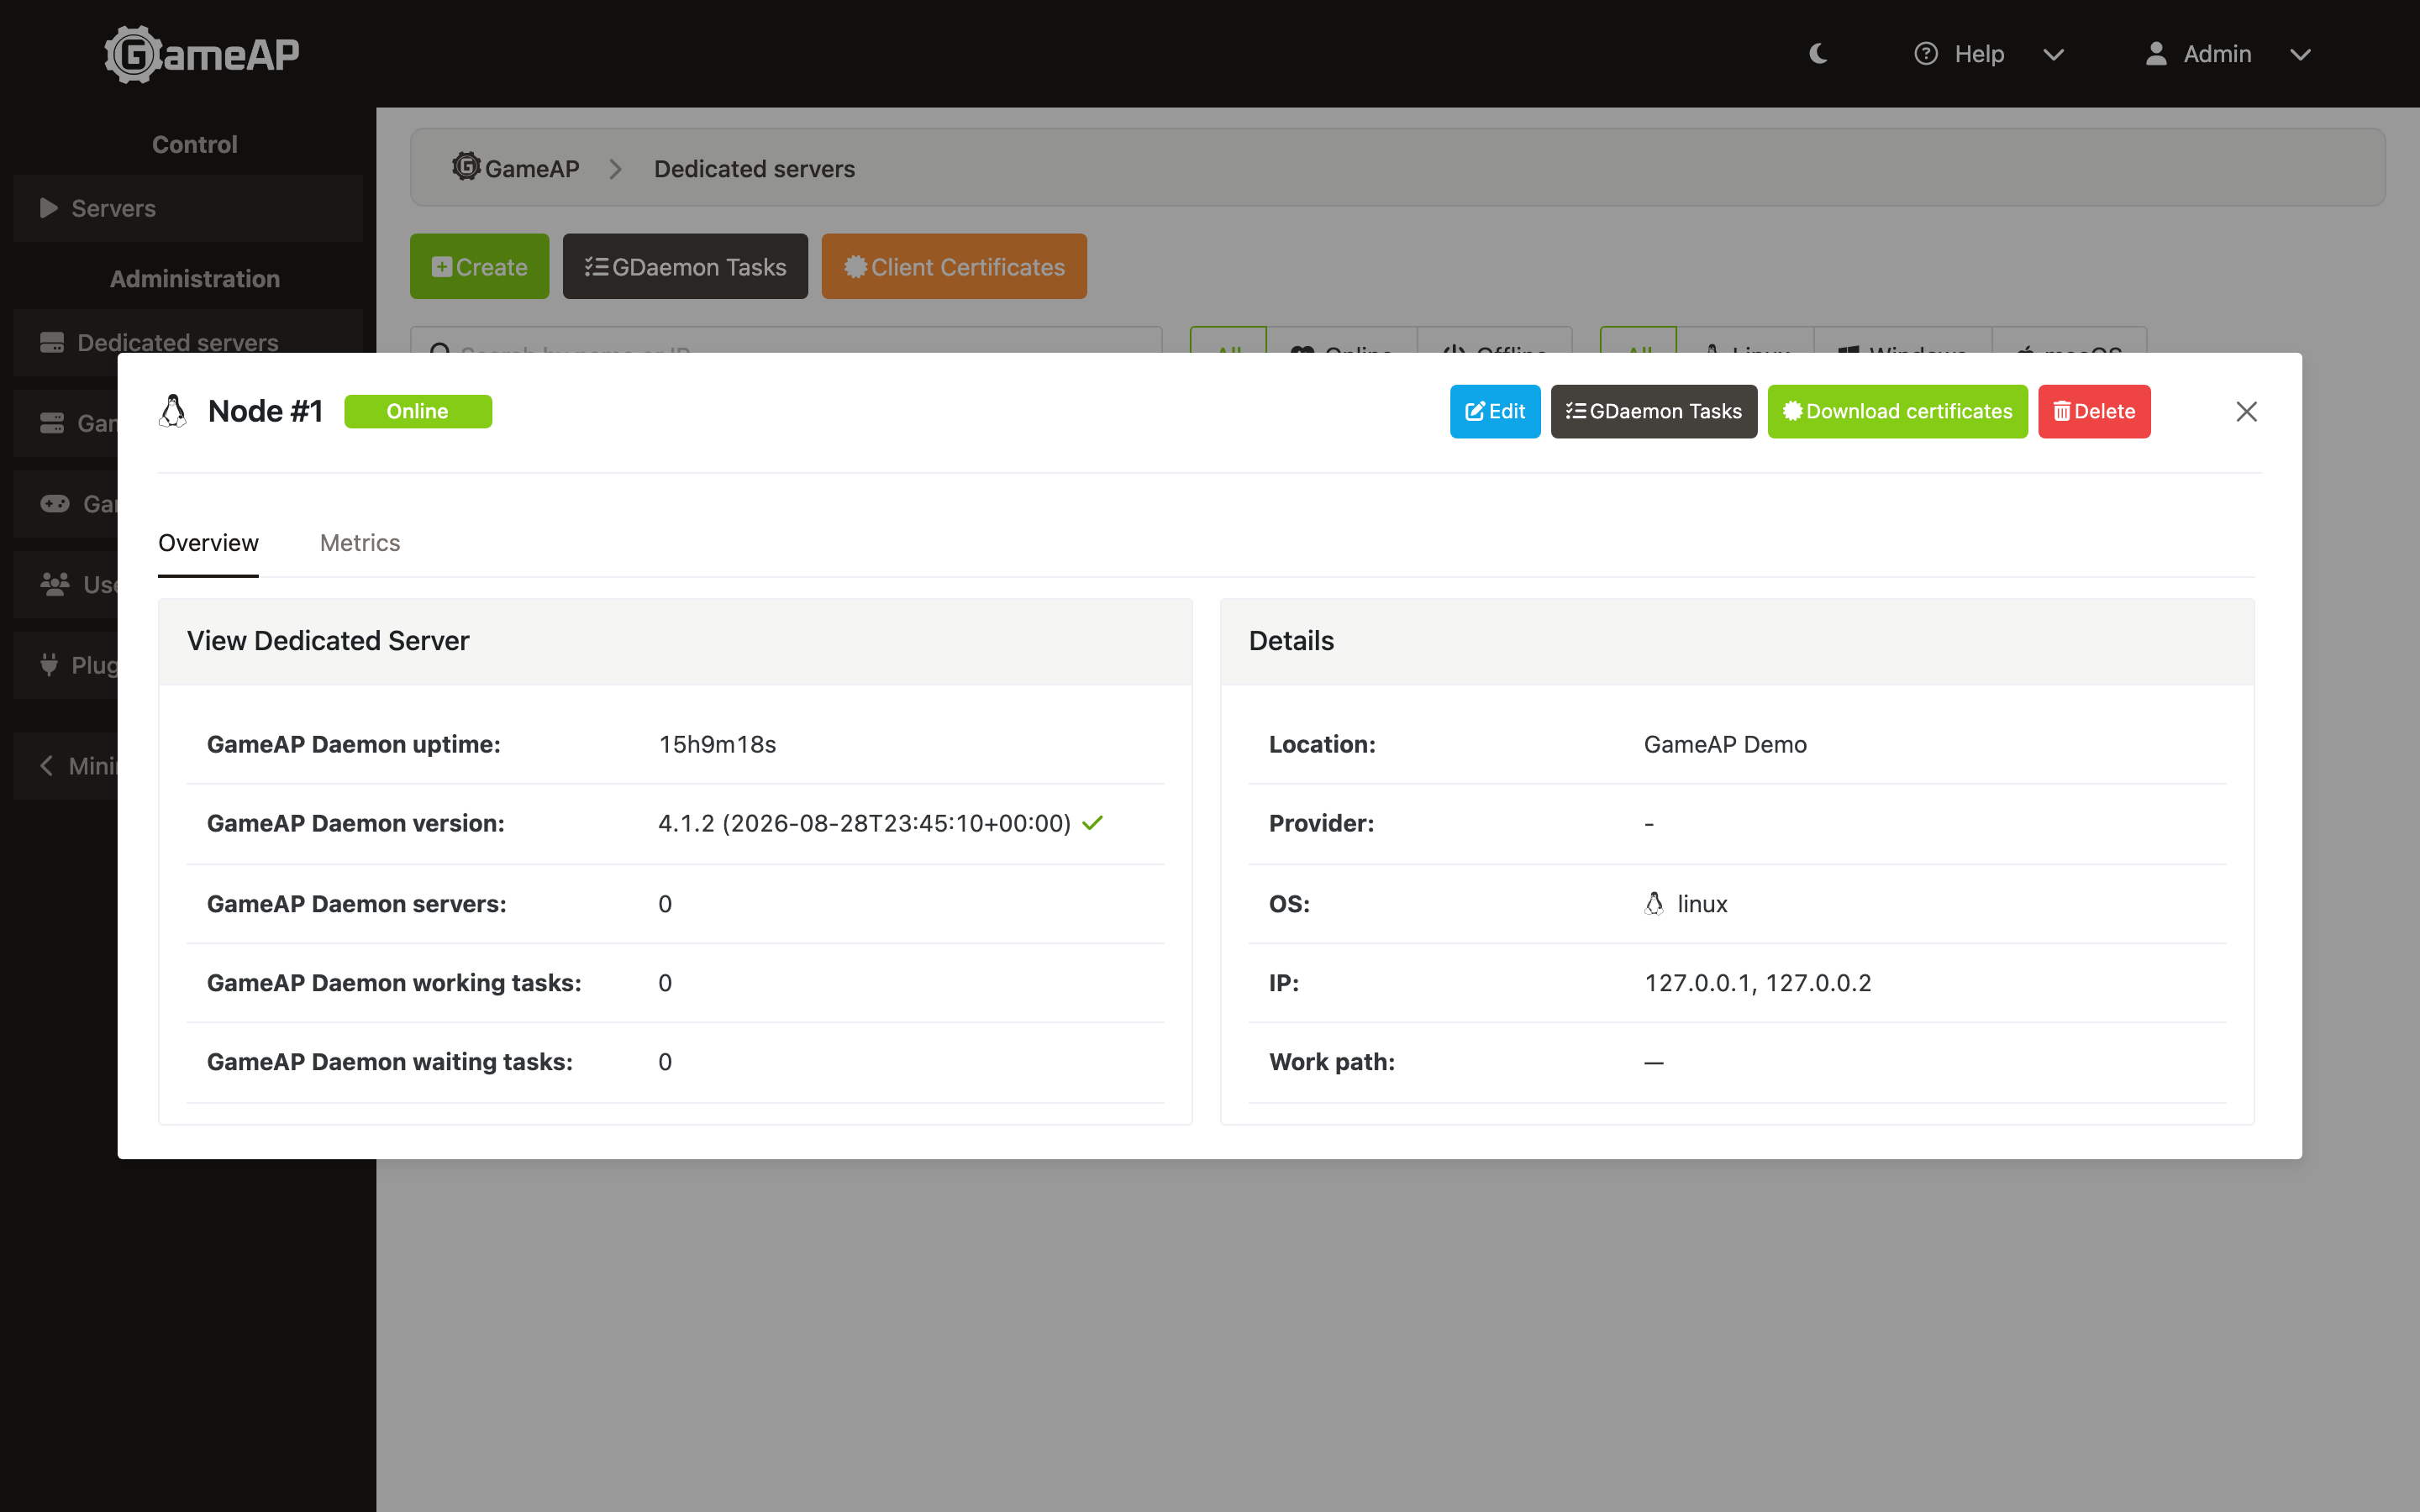
The mark is not shown for offline nodes, when the update check is disabled (UPDATE_CHECK_ENABLED=false,
see Configuration) or when the latest release could not be determined; development
builds of the daemon get neither mark. Update the daemon with gameapctl daemon upgrade — see
GameAP Daemon.
The data comes from GET /api/dedicated_servers/summary (alias GET /api/nodes/summary, administrators
only). The response contains the counters total, enabled, disabled, online, offline and the
arrays onlineNodes and offlineNodes; every item has id, name, location, enabled and online,
and the items of onlineNodes also carry version and buildDate. The outdated flag appears only on
online nodes whose daemon is older than the latest stable release.
Description of parameters
Main
The tab contains the Basic info and IP List cards.
Name
Dedicated server name, up to 128 characters. It can take any non-empty value and does not affect any features.
Enabled
Switch that marks the dedicated server as enabled or disabled.
Operating system
Linux or Windows. Required: the API accepts only linux and windows. MacOS is present in the
list but cannot be selected.
Location
Physical location of the server. Required, up to 128 characters. Shown on the card and on the Overview tab.
Provider
Hosting provider. Optional, up to 128 characters.
Working directory
This directory contains the basic scripts for managing the processes of game servers. Subdirectories
of the working directory contain the files of game servers. For the specified path,
game server directory is assigned. The default is /srv/gameap.
Path to SteamCMD
Path to the SteamCMD directory (the steamcmd.sh script is located there). The default is /srv/gameap/steamcmd.
IP list
List of IP addresses or hosts where game servers will run. At least one address is required.
Scripts
Command templates the panel uses to manage game servers on this dedicated server. Filling them in is optional: if a field is empty, the default command is used.
Metadata
Arbitrary key/value pairs attached to the dedicated server. They are intended mainly for plugins — for
example, to link a node to the cloud instance it runs on (hetzner.server_id). Limits: at most 512
keys, a key up to 255 characters, a value up to 16 KiB in serialized form.
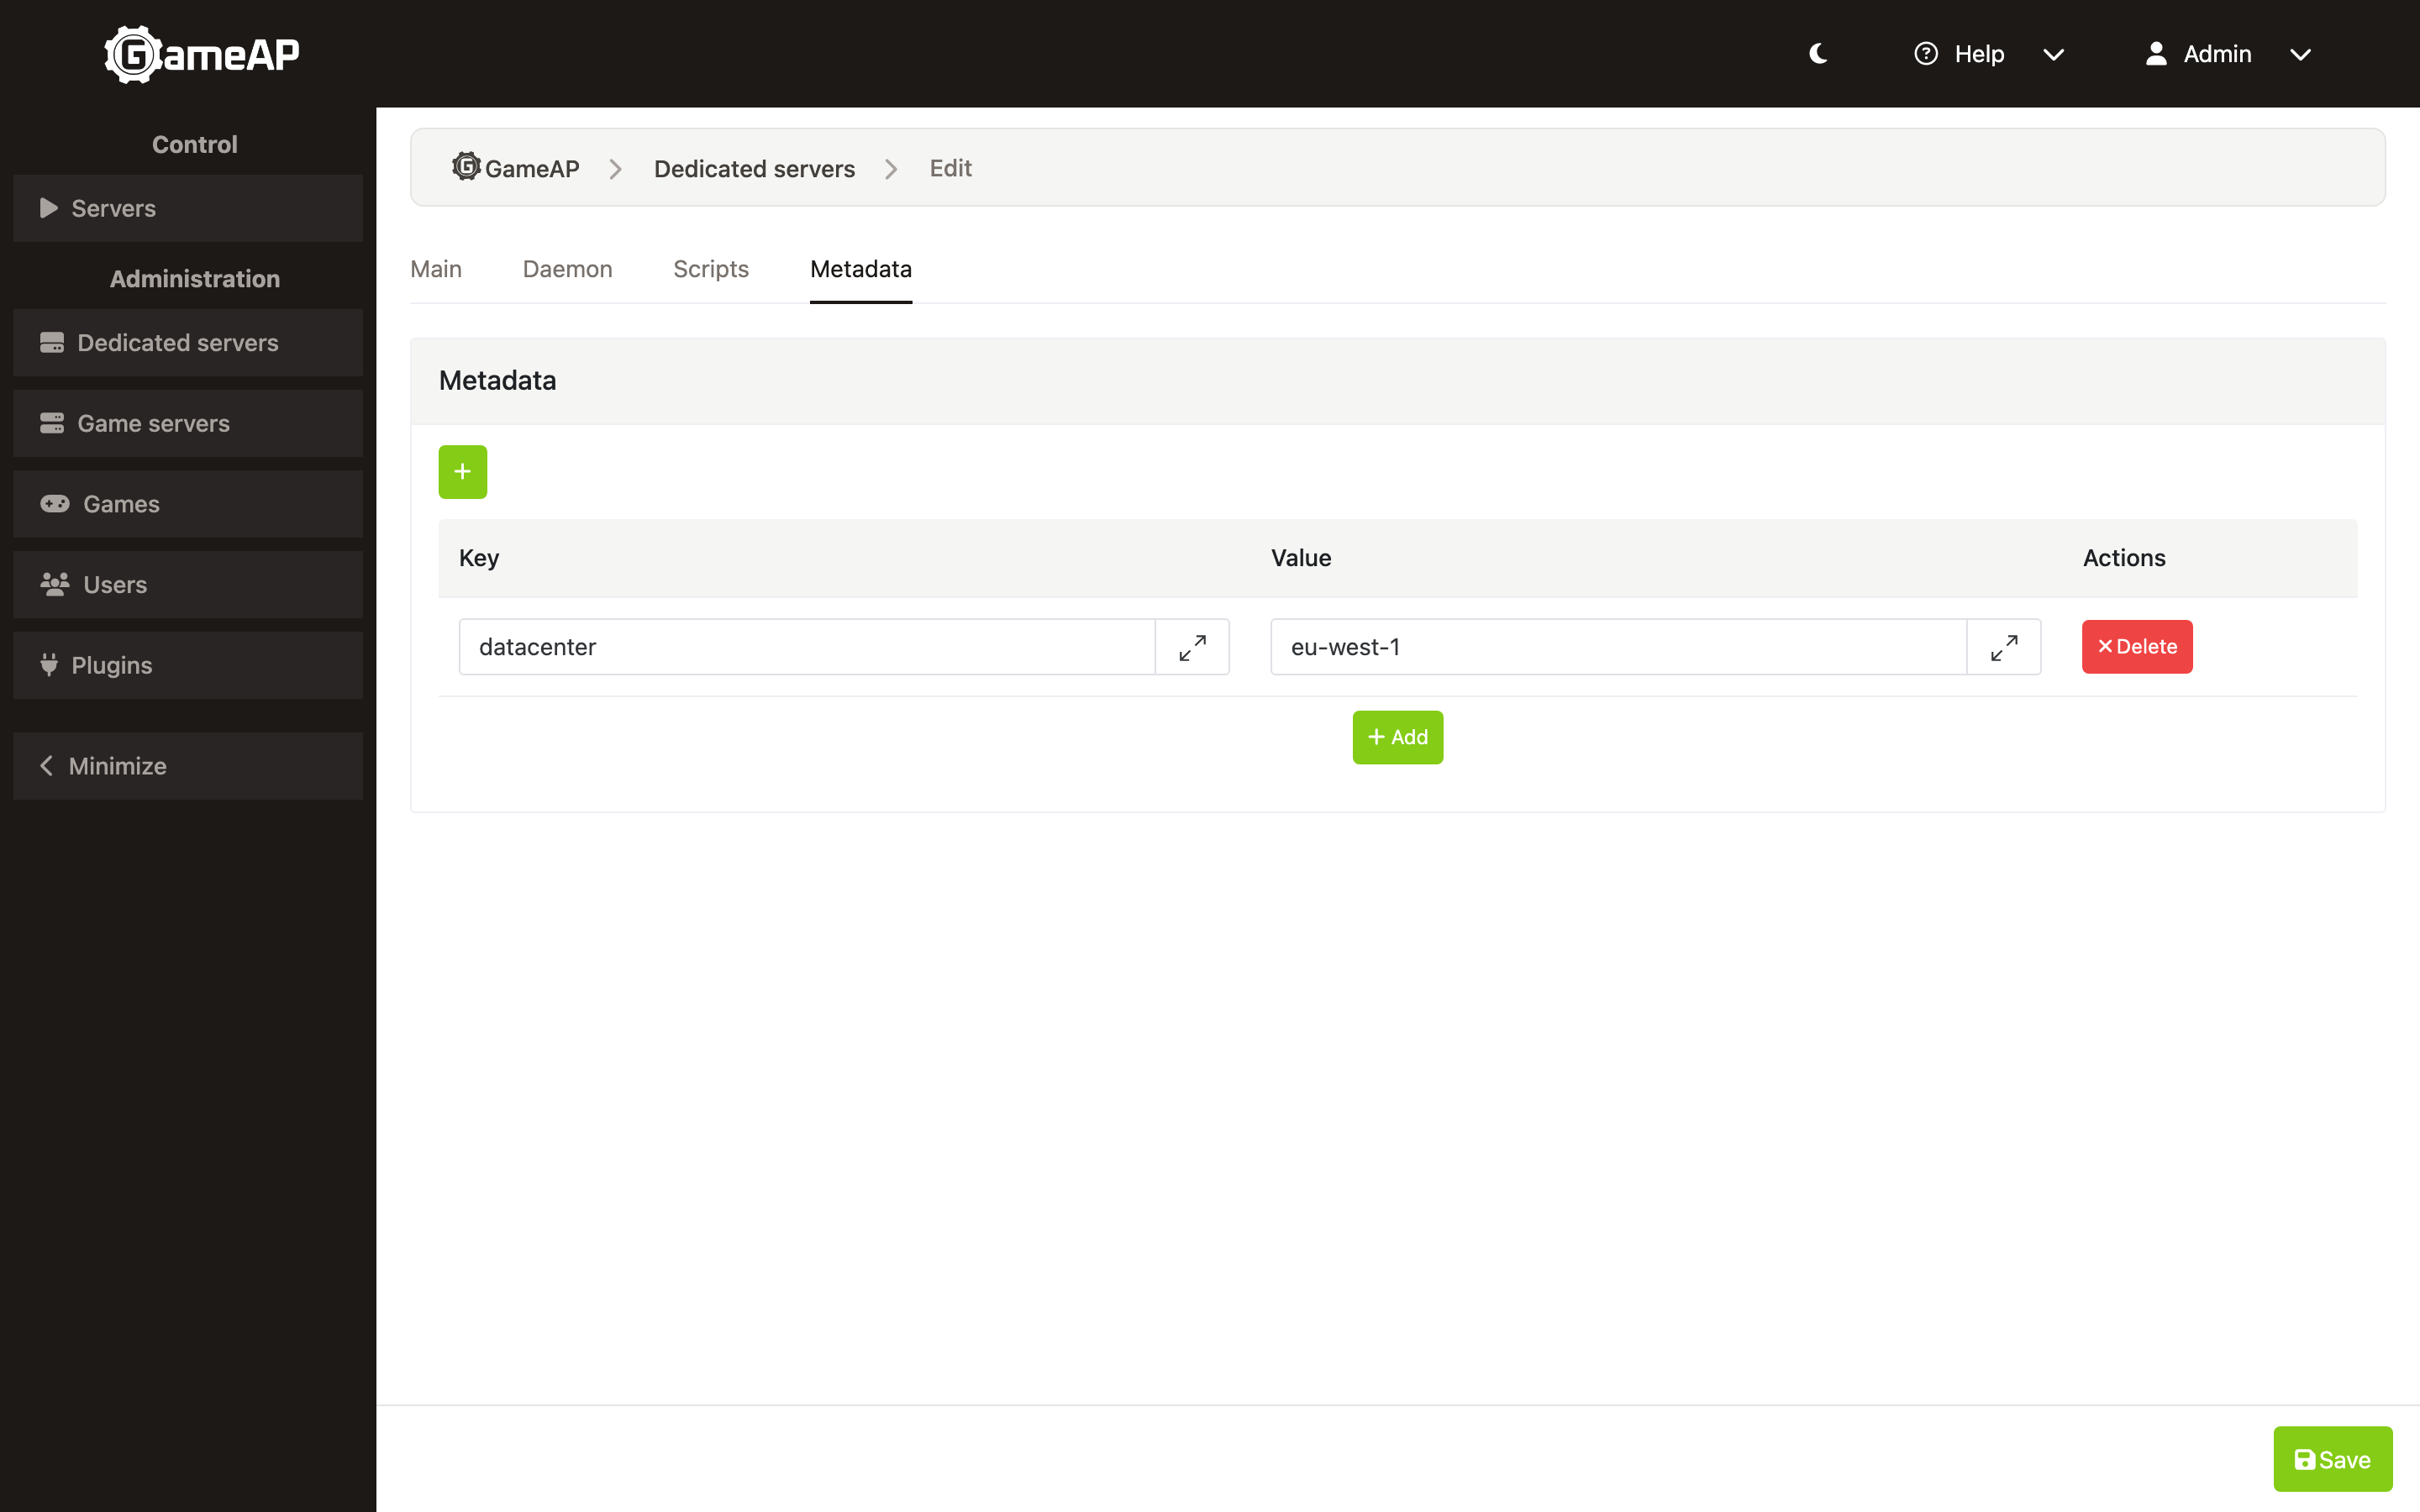
Metadata is readable by every plugin, so do not store secrets or credentials in it.
Via the API (PUT /api/nodes/{id}): if the metadata field is omitted, the stored pairs are kept; an
object replaces them entirely; an empty object {} clears them (null is not accepted). Plugins change
metadata through the plugin API: the keys they send are merged with the
existing ones, and remove_metadata_keys deletes the named keys.
Daemon
Daemon connection details. They are filled in automatically when the dedicated server is registered, and usually do not need to be changed manually.
In GameAP 4 the connection is established by the daemon: it connects to the panel over gRPC itself and keeps a persistent connection. The panel does not connect to the daemon.
GameAP Daemon host and port
The address and port the daemon reported about itself during registration. The port accepts values
from 1 to 65535, the default is 31717. The values are informational — the panel does not use them
to connect, and there is no need to open this port on the dedicated server.
On PostgreSQL panels up to 4.4.1 the port column was SMALLINT, and values above 32767 were rejected
by the database; from 4.4.2 the full range is accepted.
GameAP Daemon login and password
Legacy fields from GameAP 3, where the panel connected to the daemon itself. They are not used in GameAP 4 and do not need to be filled in.