
Getting Started
To get started, it is desirable to have two dedicated or virtual servers. On one is the control panel, on the other game servers. You can install everything on a single dedicated server.
Panel Installation
The panel is installed on a dedicated server with a database (PostgreSQL, MySQL, SQLite).

The panel is also distributed as a ready-made Docker image — see Installation in Docker.
The Easiest Installation on Linux
If you have Linux, have CURL installed and you don’t want to figure installation details out, execute command:
bash <(curl -s https://gameap.com/install.sh) --with-daemon
After the First Login
After logging in as an administrator you land on the home page. It shows the installed GameAP
version, the latest available releases of the panel and GameAP Daemon, and whether the daemons on
your dedicated servers are up to date. The check can be turned off with UPDATE_CHECK_ENABLED=false
in config.env — see the config.env Reference.
The interface is available in English, Russian, Spanish and German. Every user picks a language in
Profile → Edit Profile → Language; the choice is kept in the browser, not in the
account, and takes effect after the page reloads. Until a user has chosen, the panel uses
DEFAULT_LANGUAGE from config.env, then the browser language, and falls back to English.
Adding a Dedicated Server
Add a new dedicated server (VDS) on which you will then install game servers. After installing the panel, log in and select Administration → Dedicated servers → Create from the menu. After that, a window with instructions will open, follow them.
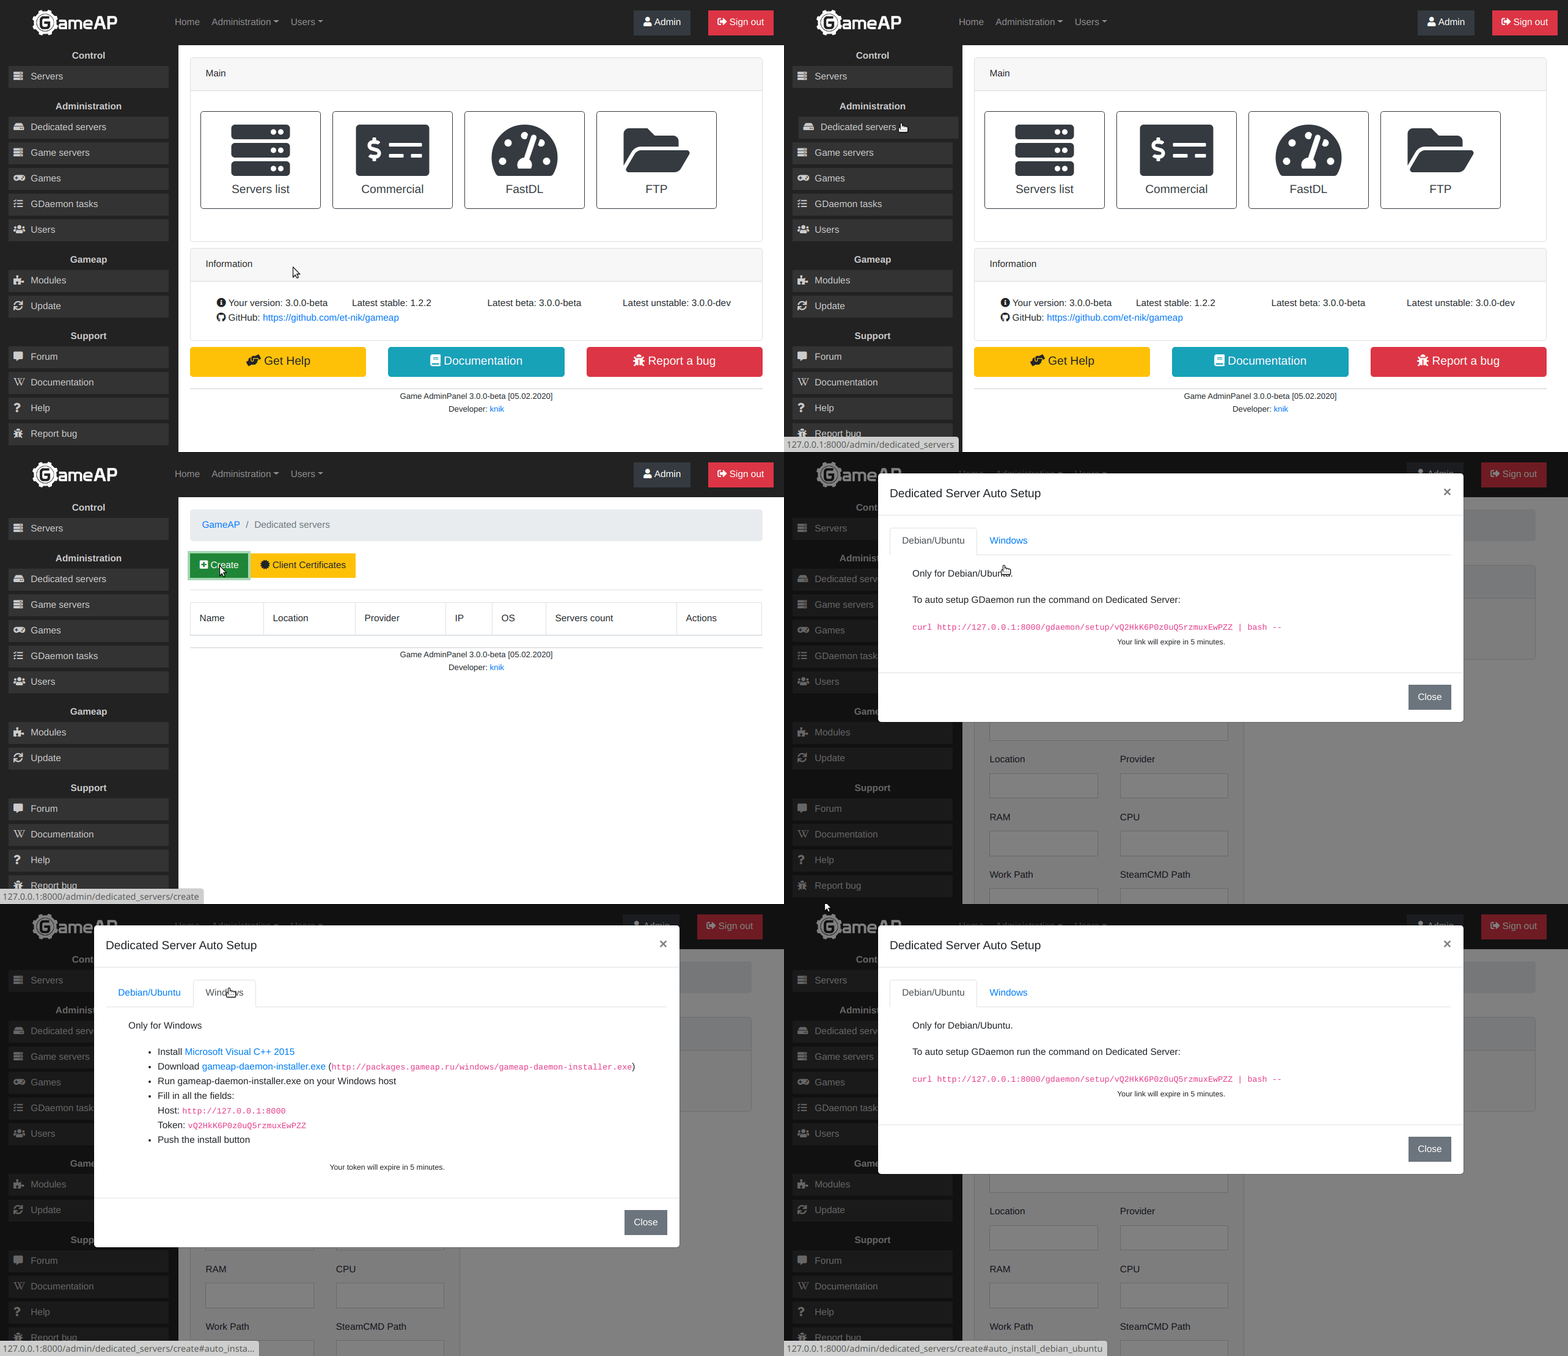
For more detailed information on installation and configuration, read the Dedicated servers page.
Adding a Game Server
Go to Administration → Game servers → Create.
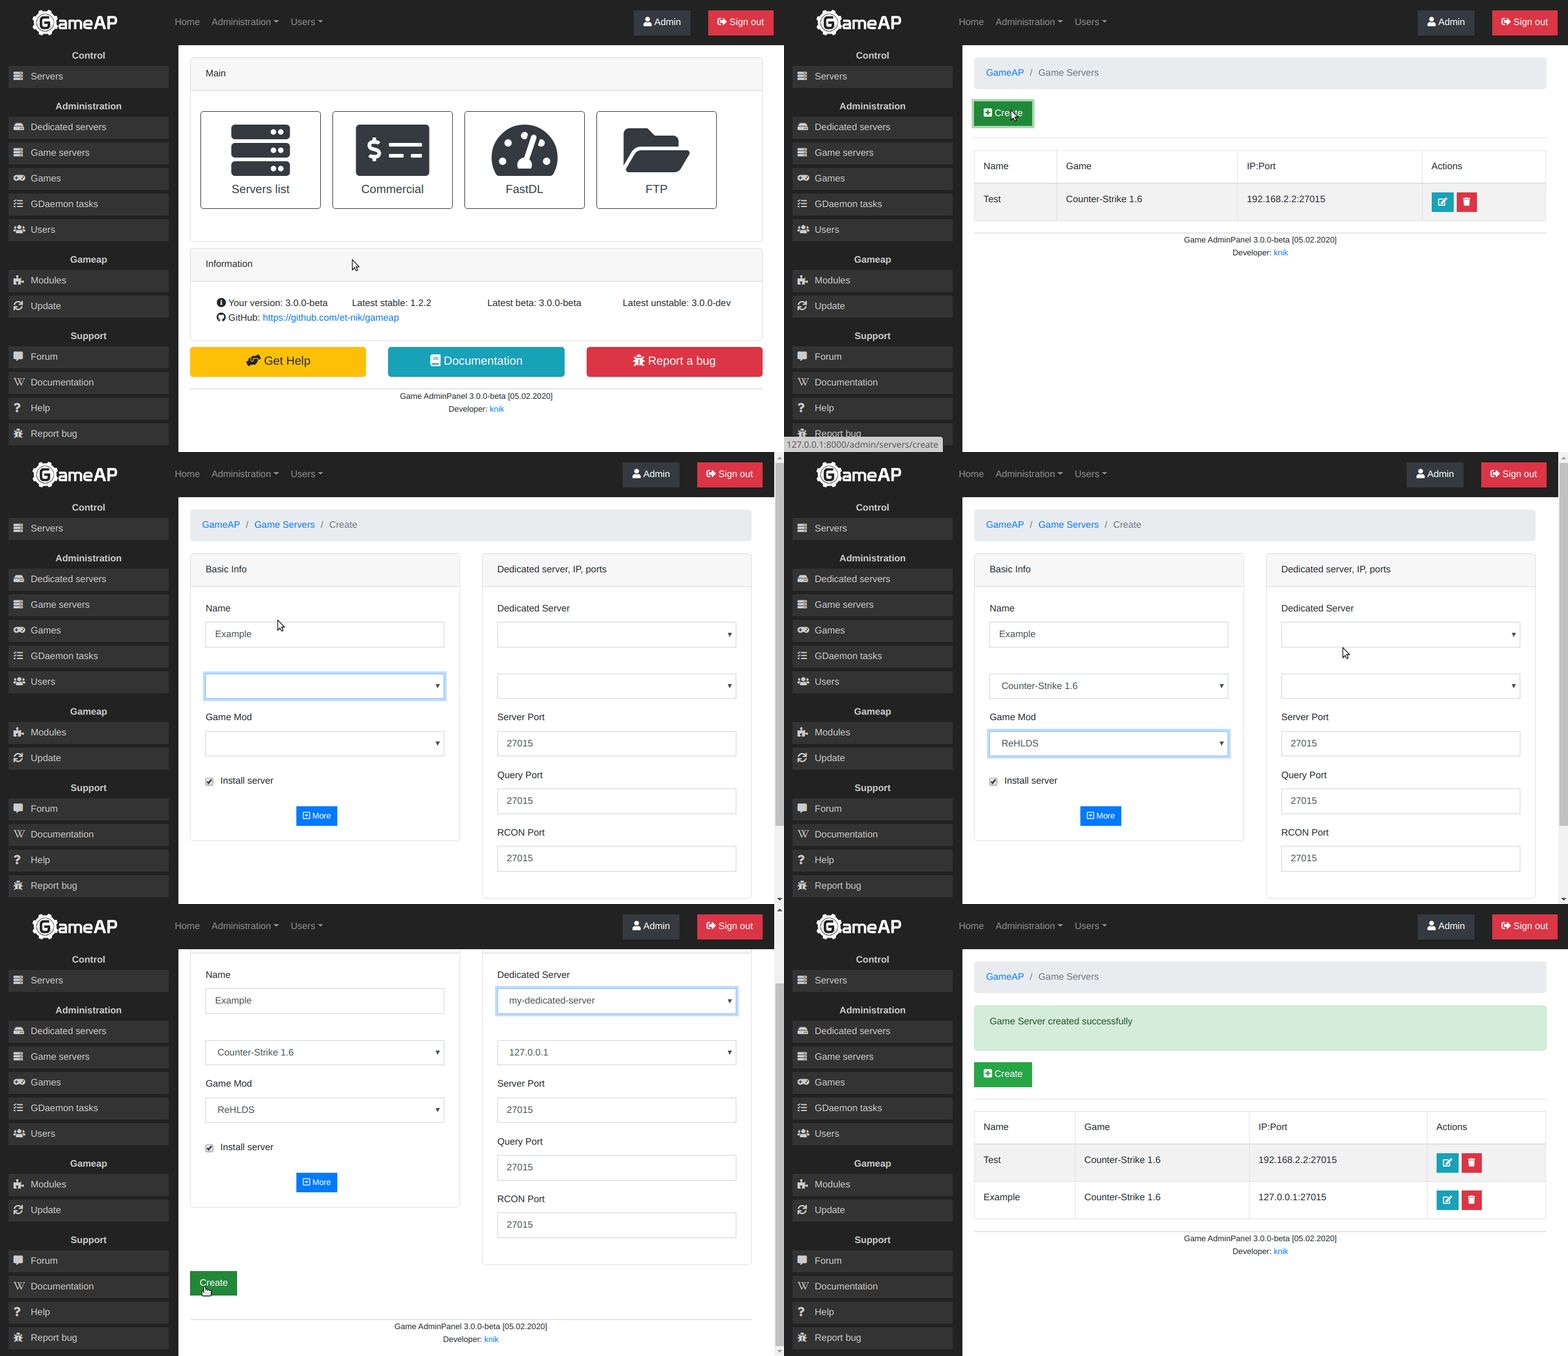
For details see game servers page.